 by
by Planning on running your Raspberry PI system as a server? In this article I’ll show you how you can setup your Raspberry PI as a headless system. So one without a monitor, keyboard and mouse. Thanks to the relatively new Raspberry PI Imager software it is quick and easy to perform such a Raspberry PI headless setup. Especially if you know how to access the hidden advanced options screen of the Raspberry PI Imager software.
Background
A headless system is one without a monitor, keyboard and mouse attached. Perfect in case you want to run your Raspberry PI system as a server. Usually, you would still need to attach at least a monitor and a keyboard to perform the initial installation, but in this article I’ll show you how you can perform such a headless setup of your Raspberry PI, without needing a monitor and keyboard.
In the past I already explained how to perform such a headless setup of your Raspberry PI. In that tutorial we used the dd command for writing the operating system to the SD card. Afterwards, we still had to manually edit a few configuration files on the SD card to make the headless setup work. Thanks to the relatively new Raspberry PI Imager software, setting up your Raspberry PI as a headless system becomes much quicker and easier. Enough to warrant a new article to this topic in my opinion.
The Raspberry PI Imager was first released in early 2020. It’s an easy-to-use graphical user interface application that ships with a few extra perks:
- Through the user interface, you can select which operating system you want to install, and the Raspberry PI Imager will download it automatically for you.
- With the Raspberry PI Imager you can restore the EEPROM bootloader on your Raspberry PI and configure the boot order.
- It has a hidden advanced options screen (Ctrl+Shift+x) to preconfigure the Raspberry PI operating system. For example changing the default hostname, enabling SSH and configuring the WiFi network connection.
Specifically this last feature, the advanced options screen, makes setting up your Raspberry PI as a headless system a breeze. Read on and I’ll show you how it’s done, including the installation of the Raspberry PI Imager software on your Linux system
What do you need
As the article’s title implies, we’ll obviously need a Raspberry PI. It doesn’t matter which one. I decided on using my Raspberry PI Zero W for this article. In addition to the Raspberry PI itself, you’ll also need:
- Power supply for your Raspberry PI.
- Micro SD card on which we’ll install the Raspberry PI operating system.
- USB card reader for connecting the micro SD card to your PC, unless your PC comes with an integrated micro SD card reader.
Ideally your PC runs a Linux operating system, but for this article it’s not absolutely necessary. The Raspberry PI Imager software is cross-platform so you could also use Windows or macOS.
Install the Raspberry PI Imager software
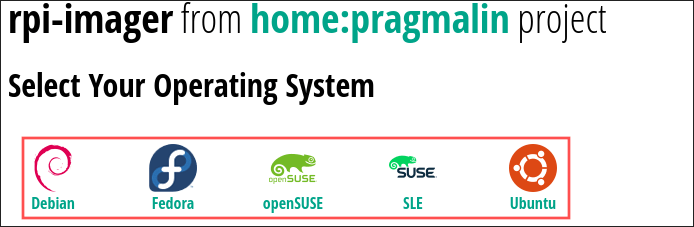
At the time of this writing, the Raspberry PI website only offers a download for the Raspberry PI Imager software for Ubuntu. To circumvent this restriction, I packaged the Raspberry PI Imager software for other popular Linux distributions, including Debian, Fedora and openSUSE. The resulting packages are hosted in PragmaticLinux’s account on the openSUSE Open Build Services infrastructure:
The remainder of this article assumes you installed the Raspberry PI Imager software on your Linux system. Refer to the article about how to install the Raspberry PI Imager on Ubuntu, Debian, Fedora and openSUSE for detailed installation instructions.
Prepare the SD card with the Raspberry PI Imager
Now that you installed the Raspberry PI Imager software on your system, we continue with preparing the SD card for your Raspberry PI headless setup.
Select the operating system and storage
Make sure you inserted your SD card into your PC and start the Raspberry PI Imager software. First we select the operating system by clicking the CHOOSE OS button on the user interface. Since we plan on installing the Raspberry PI operating system as a headless setup, we do not need a desktop environment. For this reason, the Lite edition of the Raspberry PI operating system suffices. Next, click the CHOOSE STORAGE button on the user interface to select our SD card as storage:
Configure the advanced options
The trick to creating a headless setup for your Raspberry PI, lies in the advanced options of the Raspberry PI Imager software. The advanced options dialog is a bit hidden. To access it, press the CTRL+SHIFT+x combination on your keyboard.
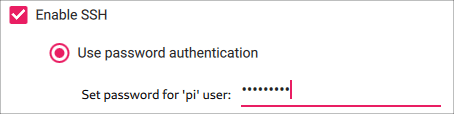
For a headless setup of the Raspberry PI operating system, the most important option is to Enable SSH. This allows you to remotely access and administer your Raspberry PI. The default password for the pi user is normally raspberry. You can change it to something harder to crack right away:
When we connect to the Raspberry PI via SSH later on, we need to know its hostname. After enabling SSH, you should therefore also set its hostname. The default raspberrypi hostname works fine:

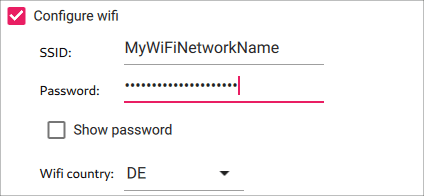
If you plan on connecting your Raspberry PI to your local network via WiFi, then check the box for Configure wifi. Next, enter your WiFi network name in the SSID box and specify the password to gain access. Finally, select your country from the Wifi country drop-down selection box.
We create a headless setup for our Raspberry PI, without desktop environment. For this reason, it is pointless to run the configuration wizard upon first boot. We can disable this first-run wizard, by checking the box Skip first-run wizard:

Optionally, you can check the box for Set locale settings and configure the time zone and keyboard layout. Once done with configuring the advanced options, click the Save button on the dialog.
Write the Raspberry PI operating system image to the SD card
Once back on the main screen of the Raspberry PI Imager, click the Write button. This starts the process for writing your selected and configured Raspberry PI operating system to the SD card.
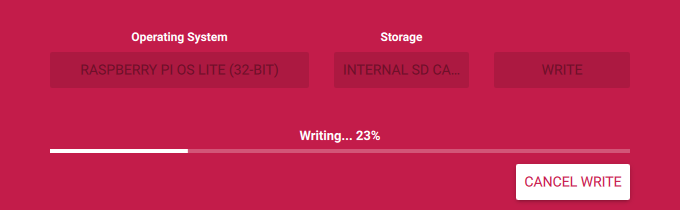
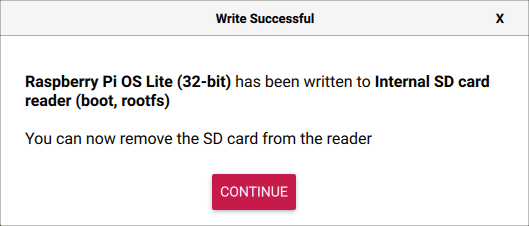
Upon successful completion of the write operation, the Raspberry PI Imager presents you with the following dialog:
Boot your Raspberry PI and connect via SSH
With the SD card prepared for running the Raspberry PI operating system as a headless setup, we can give it a try. Make sure that you disconnected the power supply from your Raspberry PI. Next, remove the SD card from your PC and insert it in the SD card slot on your Raspberry PI. Next, connect the power supply to your Raspberry PI. This boots the Raspberry PI operating system for the first time. Give it a few minutes or so for the boot process to complete.
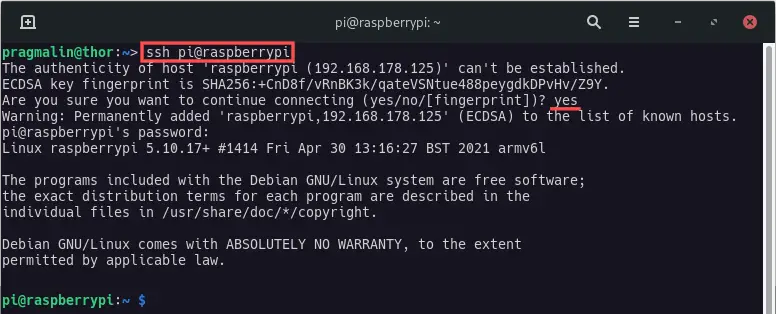
Once booting completed, you can attempt to remotely connect to it via SSH. Open up your terminal and type the following command. Enter the password for the pi user. It’s the one you specified on the advanced options dialog previously.
ssh pi@raspberrypi
This completes the basic Raspberry PI headless setup. However, a few more optional yet recommended steps follow in the sections below.
Update your Raspberry PI system
After completing the initial headless setup of your Raspberry PI, it’s a good idea to update the operating system packages. This applies the latest security fixes for the currently installed packages. While logged in via SSH, run these two commands:
sudo apt updatesudo apt upgrade
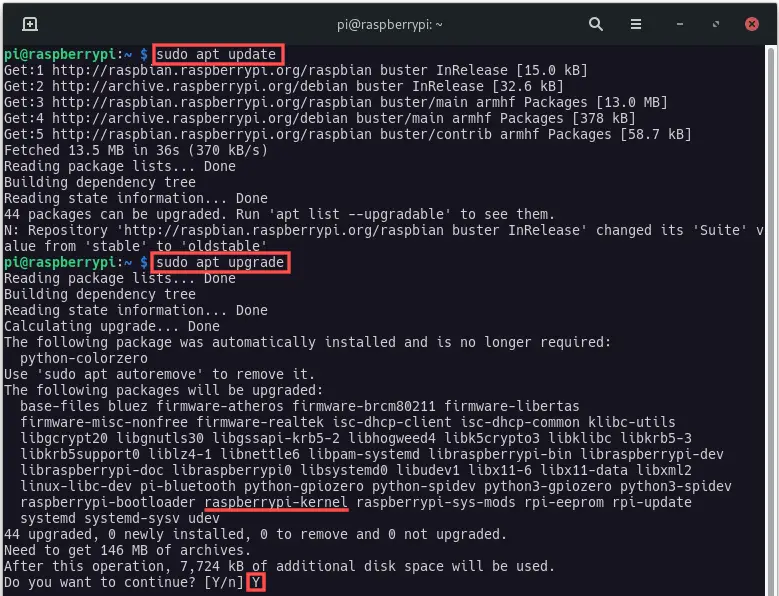
In the previous screenshot you can see that the upgrade operation installs a new kernel (raspberrypi-kernel). In this case it is recommended to reboot the system, after the upgrade finishes:
sudo reboot
And while performing some system maintenance, you might as well remove packages that are no longer needed:
sudo apt autoremove
For additional background information on performing system maintenance with APT, refer to the article on how to update Ubuntu using APT in the terminal.
Further secure your Raspberry PI
After completing the headless setup of your Raspberry PI and updating the installed packages, you could take a few extra steps to improve its security. Everyone knows that the default user account of the Raspberry PI operating system has username pi. Why not create a new user account and delete the pi one? Here’s how:
If you have more than one Raspberry PI on your network, then you need to make sure to assign a unique hostname to each Raspberry PI. You can already do this in the advanced options dialog of the Raspberry PI Imager software. In case you forget or want to change it later on, follow the instructions in this tutorial:
Logging in with a username and password combination is not the most secure. For an unwanted third party, it’s just a matter of patience before they could eventually find the right username and password combination. It’s more secure to login with an SSH key pair and then disable password logins altogether:
Wrap up
After working your way through this article, you learned how to setup your Raspberry PI as a headless system. Perfect if you plan on running your Raspberry PI as a server. Thanks to some of the advanced options of the Raspberry PI Imager software, this headless setup is quick and easy. In summary, this article covered these topics:
- Installing the Raspberry PI Imager software on your Linux system.
- Using the Raspberry PI Imager software to download, configure and write the Raspberry PI Lite operating system to the micro SD card.
- Booting your Raspberry PI headless system for the first time.
- Applying the latest security patches to the currently installed packages.
- Further securing your Raspberry PI, by deleting the
piuser account and configuring logins with the help of an SSH key pair.
Where to go from here? Well, you probably already had a purpose in mind for your Raspberry PI headless server. If not, then here is a suggestion: Configure your Raspberry PI headless system as a web server. The following two articles will help you get started: