 by
by Interested in giving Linux a try? Then you came to the right place. In this article, you’ll learn step-by-step how to install Ubuntu as a VirtualBox virtual machine. I picked the Ubuntu distribution, because it is a popular and beginner-friendly Linux based operating system. We’ll use VirtualBox to install Ubuntu as a virtual machine. That way there is zero risk of messing up your current operating system.
Background
If you look up the definition of VirtualBox, you’ll find something along the lines of “VirtualBox is a free and open-source hosted hypervisor for x86 virtualization”. Hmm…what does this mean? Simply put, VirtualBox is an application that enables you to install another operating system, within your current operating system. So the one that already runs on your PC. We’ll call this one the host operating system.
After you installed the VirtualBox application on your host operating system, you can create a new virtual machine (VM) in VirtualBox. Inside this virtual machine, you can install another operating system, for example a flavor of Linux. We’ll call this one the guest operating machine.
As such, VirtualBox is perfect for experimenting with Linux. No risk of messing up your host operating system. If something goes wrong, you simply delete the virtual machine and just try again. For those new to Linux, I highly recommend installing it first as a VirtualBox virtual machine. Once you learned the basics, you can always continue by installing it on real hardware. For example on an old PC, as dual-boot on your current PC or on a Raspberry PI. You can also just keep on running Linux in a virtual machine. There is nothing wrong with that.
When you are just getting started on your Linux journey, you typically wonder: “Which flavor of Linux should I start with”? Theoretically you can start with whatever distribution you fancy: Ubuntu, Debian, Fedora, openSUSE, Manjaro, etc. According to general consensus though, Ubuntu is beginner-friendly and always a good pick for your first ever Linux experience. For this reason, this article teaches you how to install Ubuntu as a virtual machine in VirtualBox.
What do you need
For completing the steps in this article, you just need a PC. It can run Windows, Mac OS or Linux. Ideally your PC has 8 GB of RAM and about 50 GB of free space on your hard disk. I assume that you already installed VirtualBox on your PC. If not, then head over to the download page of the VirtualBox website, download VirtualBox and follow the installation instructions. It’s pretty straightforward.
Download the Ubuntu Desktop 20.04 LTS ISO image
As a first step, we download the Ubuntu installer. We’ll go for Ubuntu Desktop 20.04 LTS. This is the current stable long term support (LTS) release. Its version number 20.04 reflects that is was released in April of 2020. Each LTS release receives a whopping 5-years of free security updates from Canonical, the developer and maintainer of Ubuntu.
To download Ubuntu Desktop 20.04 LTS, point your web browser to the Ubuntu Desktop download page. Next, click the Download link for Ubuntu 20.04 LTS:
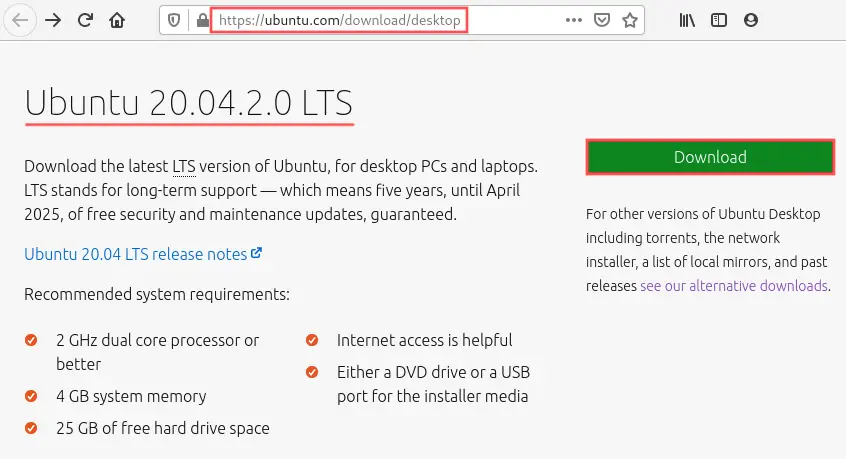
This automatically starts the download of a file with the ISO extension. This file is a so called ISO image, which is short for optical disc image. As the name implies, you normally write this ISO image file to a CD or DVD and then boot your PC from this disc. However, we can skip the actual CD/DVD burning part, since we plan on using a VirtualBox virtual machine. Later on you’ll see that we can directly link this Ubuntu ISO file to the virtual machine’s CD/DVD drive. On my Debian based laptop, my Firefox browser stored the downloaded Ubuntu ISO file at:
/home/pragmalin/Downloads/ubuntu-20.04.2.0-desktop-amd64.iso
Create a new virtual machine in VirtualBox
After downloading the Ubuntu ISO image, we proceed with the creation of a new virtual machine. Start the VirtualBox application and select Machine → New… from the program menu. Alternatively, you can simply click the New icon on the toolbar.
Name and operating system
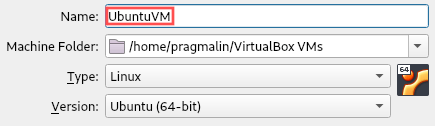
The Create Virtual Machine dialog appears, asking you to enter the name for your virtual machine. This can be anything you like. After exploiting all my creative energy, I came up with the perfect name: UbuntuVM. Once you entered the name, make sure the Type selection box shows Linux and the Version selection box shows Ubuntu (64-bit).
Memory size
Proceed to the next screen by clicking the Next button. On this screen you can configure how much of the PC’s physical RAM your virtual machine can use. For an Ubuntu desktop installation, you should ideally select at least 4 GB, so 4096 MB. In any case, I recommend selecting no more than 50% of your PC’s physical RAM. Since my laptop has 8 GB physical RAM, I allocated 4096 MB for the virtual machine:

Hard disk
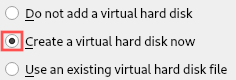
Click the Next button to move on to the next screen, where you select the type of hard disk for the virtual machine. Accept the default setting Create a virtual hard disk now and click the Create button.
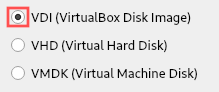
As a next step, you can select the hard disk file type. VirtualBox stores the virtual hard disk as a single file on your PC. VDI is the native virtual hard disk type for VirtualBox, so I recommend sticking with that one:
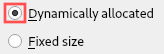
After clicking Next, you arrive at the screen where you can select how VirtualBox stores the virtual hard disk on your PC. It can create a file with the same size of what you plan on configuring for your virtual hard disk (Fixed size). Alternatively, it can keep the file as small as possible and then only increase its size, when the virtual machine stores more data on the virtual hard disk (Dynamically allocated). In any case, the file size never grows beyond the hard disk size you configure on the next screen. The default of Dynamically allocated works fine:
On the next screen, you can select the name and location of the virtual hard disk file. I typically accept the default name and location for this, but feel free to change it. More importantly, you can select the maximum size of the virtual hard disk on this screen. The default proposed 10 GB suffices to install Ubuntu Desktop. Over time you probably experiment and install more applications, so it might get tight. Therefore I recommend increasing this to at least 20 GB. I decided on 30 GB:

Complete the virtual hard disk creation by clicking the Create button.
Fine-tune the virtual machine settings
We now created the framework for the virtual machine, in which we can momentarily install Ubuntu. Before starting the actual Ubuntu installation, I recommend fine-tuning a few more virtual machine settings. With the newly created Ubuntu virtual machine selected on the VirtualBox user interface, click the Settings button on the toolbar. Alternatively, you can select Machine → Settings… from the program menu.
Increase number of CPUs
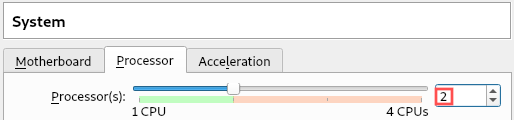
On the newly appeared virtual machine Settings dialog, go to the System category and select the Processor tab. By default the virtual machine only makes use of one processor core of your PC’s physical CPU. Nowadays, most PCs offer at least a duo-core CPU. To give the virtual machine a bit more performance, I recommend increasing the CPU number to at least two. I recommend selecting no more than half of your PC’s physical CPU cores. So stay within the recommended green zone:
Improve graphics performance
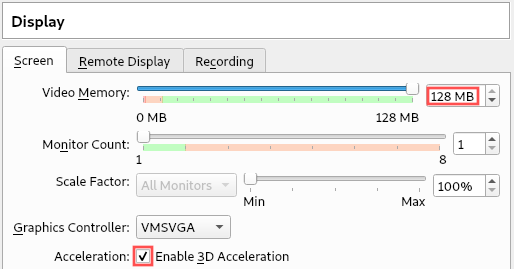
By far the most limiting feature of a virtual machine is its graphics performance. Unlike the CPU and RAM, it cannot directly access your PC’s graphics card. Instead, your virtual machine runs on top of a software emulated graphics card. Consequently, virtual machines are not capable of running high-end games or doing intensive 3D modeling. Everything else works pretty much okay though.
Because of the graphics performance being a bottleneck, the least we can do is max out the display configuration. Go to the Display category on the Settings dialog. Next, select the maximum possible amount of Video Memory and activate the Enable 3D Acceleration check box:
Insert the Ubuntu ISO image into the virtual optical disk drive
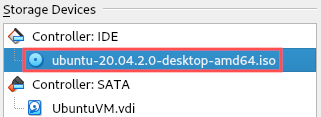
From a virtual machine configuration perspective, only one last step remains: We need to virtually insert the previously downloaded Ubuntu ISO image into its optical disk drive. Go to the Storage category on the Settings dialog. Select the Empty storage device to show the optical drive attributes. Click the small blue disk icon. A drop down menu appears. Select Choose a disk file… from this menu:
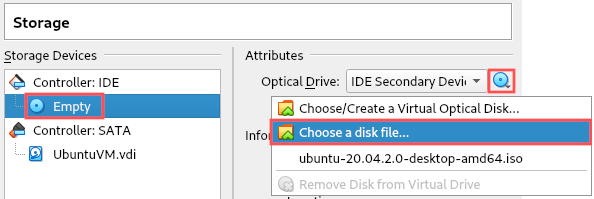
A file selection dialog shows up. Browse to the download directory of the Ubuntu ISO image and select this file:
This completes the final configuration of the virtual machine itself. Click OK at the bottom of the Settings dialog to save our changes.
Install Ubuntu in the VirtualBox virtual machine
In the previous section we created a new virtual machine and prepared it for installing Ubuntu. In this section, we continue with the actual installation of Ubuntu in the VirtualBox virtual machine.
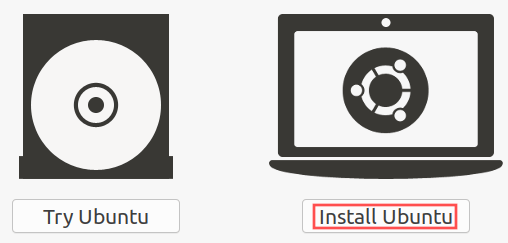
With our Ubuntu virtual machine selected on the VirtualBox user interface, click the Start button on the toolbar. It’s the one with the green arrow icon. Alternatively, you can select Machine → Start → Normal Start from the program menu. The virtual machine starts, detects our bootable Ubuntu ISO disk in its optical drive and starts booting from it. Upon completion of the boot process, it presents you with the Installer program, running inside a live Ubuntu environment. Start the installation by clicking the Install Ubuntu button:
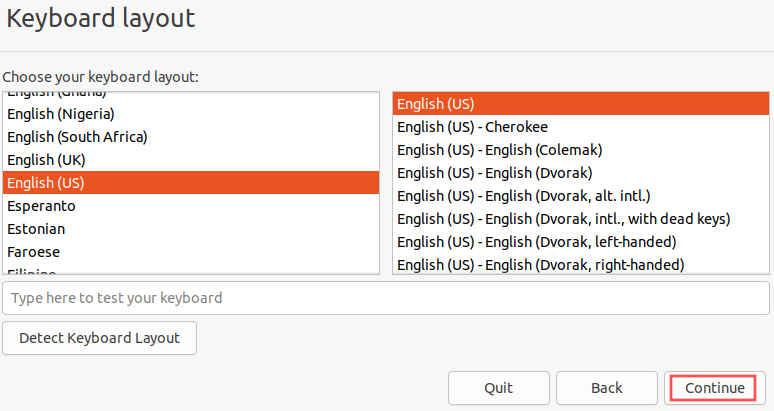
Keyboard layout
The installer first prompts you to select the keyboard layout. If you are not sure, you can click the Detect Keyboard Layout and a wizard with assist you with determining the layout of your keyboard. Once selected, click the Continue button.
Updates and other software
On the Updates and other software screen you can select what you would like to install on your Ubuntu system. For your first Ubuntu installation inside a VirtualBox virtual machine, you can keep the defaults, so:
- Normal installation
- Download updates while installing Ubuntu
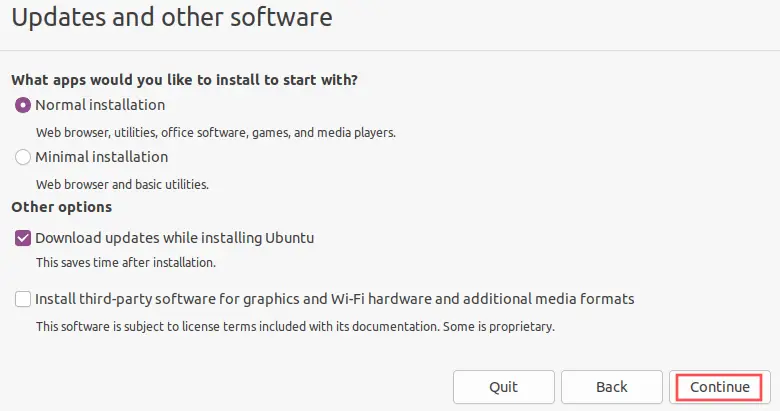
Click the Continue button to proceed.
If in the future you plan on installing Ubuntu on real PC hardware, I recommend selecting the check box for installing third party software. This includes proprietary software drivers that Ubuntu might need to run properly on your PC hardware.
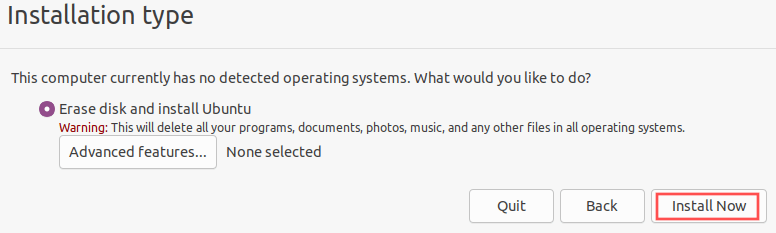
Installation type
Now that we selected what to install, we continue with informing the installer where to install it. The installer automatically detected our hard disk. It’s the newly created VDI file. When installing Ubuntu for the first time, you can simply accept the default here: Erase disk and install Ubuntu. Under the hood this creates a Linux root (/) EXT4 partition, where it will install all the files. If you are coming from Windows, think of it as your C:\ drive.
In the future you might want to experiment with a different partition layout. For example, placing the home (/home) directory on a separate EXT4 partition. In this case you would click the Advanced features and change the partitioning layout.
Kick off the actual installation process, by clicking the Install Now button.
A dialog appears asking you to confirm the changes to the hard disk. It does this because all current contents will be erased. There is nothing to worry about for us here, because the VDI hard disk is completely empty at this point. Simply click Continue and the installer will partition the hard disk and start copying the files of the Ubuntu operating system to it.
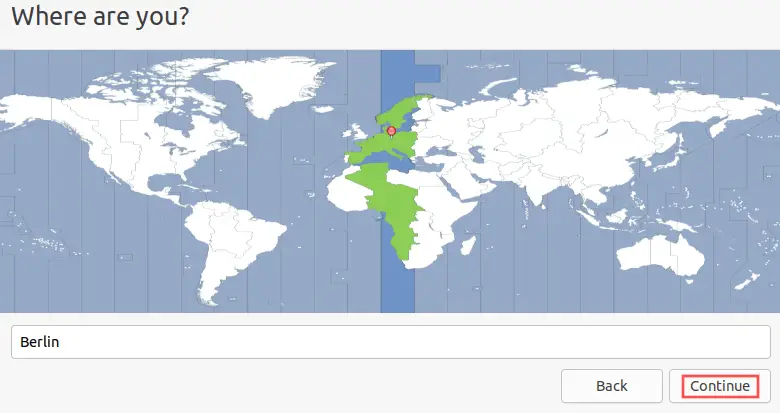
Where are you?
While the installer already copies the Ubuntu operating system in the background, it asks you for a few more things. Your present location for example. Since the virtual machine shares the Internet connection of your host operating system, the installer probably already detected your location. If incorrect, click on the world map to select the physical location of your PC. The Ubuntu installer uses this information to properly configure the timezone. Once done, click the Continue button.
Who are you?
The final pieces of information the Ubuntu installer requires, configures your user account and the hostname of your virtual machine. Feel free to adjust this to your personal preferences:
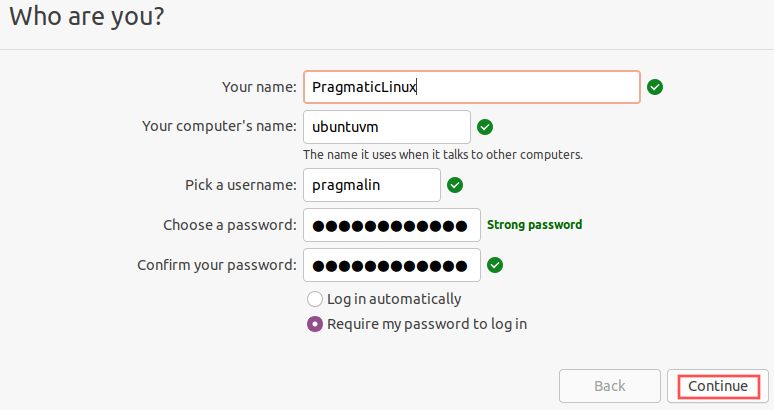
Click the Continue button to move on. The installer presents you with a slide show together with information about the installation progress.
Boot your Ubuntu virtual machine for the first time
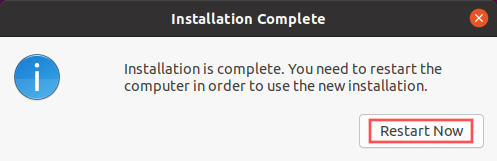
Upon completion of the installation procedure, the Ubuntu installer informs you about this event and offers you the option to restart the virtual machine. Go ahead and click the Restart Now button on this dialog:
It boots down the Ubuntu live environment. At the end, it asks you to remove the installation medium. Our virtual machine does not have a physical DVD drive. Therefore we do not have to physically take the Ubuntu installation disk out. Simply continue by pressing the Enter key. This restarts the virtual machine and boots our newly installed Ubuntu system.
Once booting completes, the login manager shows your user account. Click on your name and enter your password to login to the Ubuntu desktop environment. Once logged in, your Ubuntu desktop looks like this:
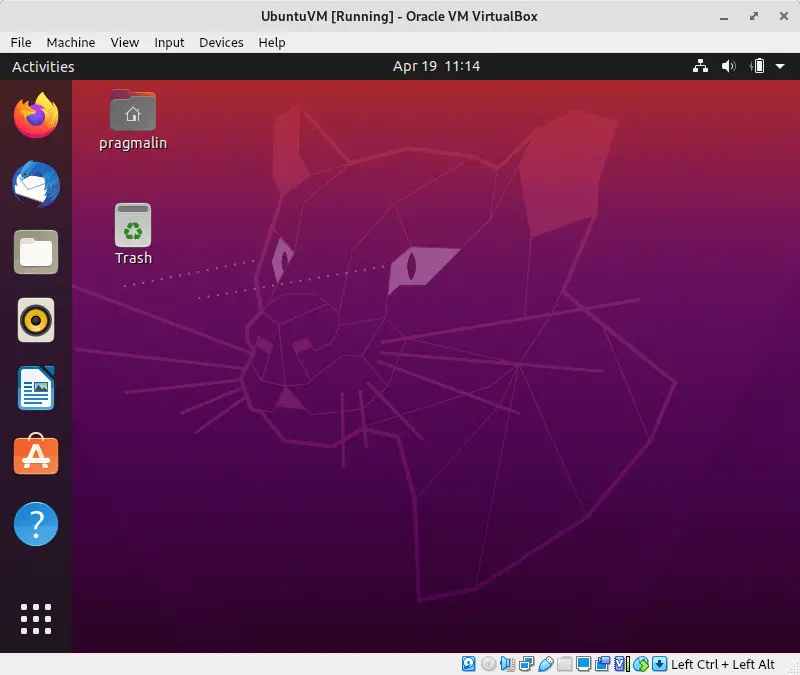
Congratulations! You now know how to install Ubuntu Desktop as a virtual machine in VirtualBox. Feel free to start playing around with it and familiarizing yourself with the default Gnome desktop environment.
Create a snapshot of the Ubuntu virtual machine
An added benefit of VirtualBox, is that it features virtual machine snapshots. When you create a snapshot, VirtualBox remembers the current state of your virtual machine hard disk and settings. At a later point you can then rollback to this snapshot. Perfect for experimenting with Linux for the first time. If something goes wrong, you just perform such as snapshot restore operation.
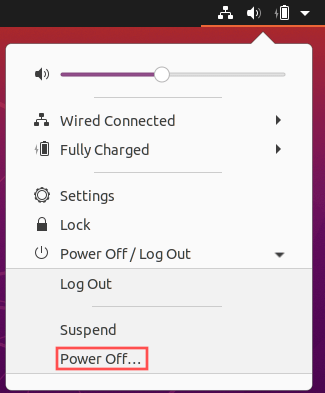
Although optional, I highly recommend creating a snapshot of your Ubuntu virtual machine. Since you just completed its initial installation, now would be a good time for this. To create a new snapshot, the virtual machine should be turned off. To boot down Ubuntu, click the little arrow button on the top-right of the screen. A menu appears where you can select to Power Off… Ubuntu:
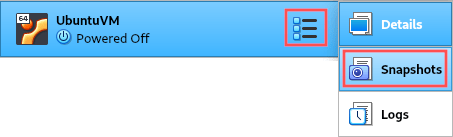
On the VirtualBox main window, with the virtual machine selected, click on the icon that looks like a bulleted list. A popup menu appears, where you can select Snapshots:
This opens up the snapshots overview of the virtual machine. To create a new snapshot, select Snapshot → Take… from the program menu or click on the Take toolbar button. Now you just enter a descriptive name for the snapshot and click the OK button to create it. I named it First install.
If you ever need to rollback to this snapshot, select it on this snapshot screen and click the Restore button:

Wrap up
In this article you learned how to install Ubuntu in a VirtualBox virtual machine. In my opinion, this is an ideal way to get acquainted with Linux. Ubuntu, because it is a popular and beginner-friendly Linux distribution. VirtualBox, because of the zero risk of messing up your PC. We completed the following steps:
- Downloaded the Ubuntu Desktop 20.04 ISO image.
- Created and configured a new VirtualBox virtual machine.
- Installed Ubuntu in the virtual machine.
- Made a snapshot of the freshly installed Ubuntu virtual machine.
Where to go from here? Well, as you might have noticed you cannot yet increase the screen size of your virtual machine. So if you increase or maximize the virtual machine window, the Ubuntu desktop doesn’t scale up its resolution. To solve this and get some more VirtualBox related improvements, I highly recommend installing the so called VirtualBox guest additions. You can find step-by-step instructions in this article:
Over time, you might run out of disk space on your VDI hard disk. You can increase its size, but it’s a bit tricky. For this reason I dedicated an entire article to this topic: