 by
by Did you know that you can boot your Raspberry PI 4 directly from a USB drive? You get better disk I/O speed, you no longer need to worry about SD card corruption and you reduce cost, especially if you require large storage capacity. Best of all, recent Raspberry PI 4, 400 and Compute Module 4 boards support boot from USB by default. This article teaches you all you need to know about how to boot your Raspberry PI 4 from a USB drive.
Background
Most users boot and run the operating system on their Raspberry PI directly from an SD card. An alternative approach exists: You can boot the Raspberry PI 4, 400 and Compute Module 4 directly from a USB drive. A few reasons why you would want to do this:
- Disk I/O speed improvements, especially if you connect the USB drive to a USB 3 port on the Raspberry PI 4.
- Bypass a possible SD card corruption, which likely happens when running your Raspberry PI 24/7.
- Cost savings, most notably when you need large storage capacity.
Starting with the Raspberry PI 4, 400 and Compute Module 4, the boot code is stored in an EEPROM chip. The older Raspberry PI models stored the boot code in a file called bootcode.bin on the boot file system (/boot). With the boot code stored in EEPROM, it persists even if you wipe or change the operating system.
To configure your Raspberry PI 4 to boot from a USB drive, you just need to enable this feature inside the boot code, stored in EEPROM. And here’s the best part: Most Raspberry PI 4 boards enable this feature by default! Only a small batch of early Raspberry PI 4 boards shipped with this feature disabled.
This article explains how to store an operating system for your Raspberry PI 4 on a USB drive, such that it can boot from USB. It also covers how to enable the boot from USB feature in the boot EEPROM, in case this feature isn’t enabled yet.
What about older Raspberry PI models?
This article primarily focuses on booting a Raspberry PI 4, 400 and Compute Module 4 from a USB drive. However, with a little trick, you can reap the same benefits if you own an older model such as a Raspberry PI 1, 2, 3 or Zero. The trick involves moving the root file system (/) to a USB drive and just leave the boot file system (\boot) on the SD card.
With this approach, your Raspberry PI still boots from the SD card. However, the actual operating system itself runs from the USB drive. Since the boot operation only needs to reads from the SD card, you won’t run into SD card corruption problems. Just keep in mind that you get better disk I/O performance on a Raspberry PI 4, because it supports USB 3 ports. For step-by-step instructions on using this approach, refer to this tutorial:
What do you need
To complete the steps outlined in this tutorial, you need the following:
- A basic Raspberry PI 4 setup. This includes a power supply, SD card, HDMI cable, monitor, mouse and keyboard.
- The Raspberry PI Imager software installed on your PC.
- A USB drive.
Theoretically you can use a simple 4 GB or more USB flash stick for this tutorial. However, for the best performance I recommend a SATA or NVMe SSD drive with a suitable USB 3 adapter. For this tutorial, I’ll use a Samsung 860 EVO 250 GB SSD in combination with a Nedis USB 3.2 2.5″ SATA USB adapter. Note that not all SATA to USB 3 adapters fully work with the Raspberry PI 3. For more details and a potential fix, refer to article:
I’ll use my openSUSE Tumbleweed based PC throughout this article, on which I already installed the Raspberry PI Imager software. In case you did not yet install the Raspberry PI Imager software on your Linux PC, you can find step-by-step instructions here:
For this article a Linux PC is optional. A Windows or Mac PC also works, as long as you installed the Raspberry PI Imager software on it.
Note that by completing the steps in this article, you’ll erase the data on both your USB drive and SD card. If you do not want to lose this data, make a backup of the USB drive and SD card contents first.
Install the Raspberry PI operating system on the USB drive
At this point we do not yet know for certain, if the boot code in the EEPROM of your Raspberry PI already supports booting from a USB drive. Let’s just assume for now that it does. This means we move forward by installing the Raspberry PI operating system on the USB drive. This works exactly the same as with an SD card, when using the Raspberry PI Imager software. You just need to select the USB drive as the storage, instead of the SD card.
Go ahead and insert the USB drive into your PC and start the Raspberry PI Imager software application. On the application’s main window, click the CHOOSE OS button. Next, select the operating system you would like to run on your Raspberry PI. At the time of this writing, a few problems exist in the default Debian 11 “Bullseye” based Raspberry PI OS (32-bit) version. Therefore, I decided on the Debian 10 “Buster” based Raspberry PI OS (Legacy) version:
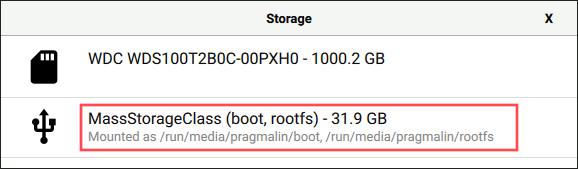
After selecting the operating system, click the CHOOSE STORAGE button and select your USB drive. Important: Double-check that you selected the correct drive before proceeding, because the next step erases its contents!
Once you double-checked that you selected the correct drive, move forward by clicking the WRITE button. This writes the image of the selected Raspberry PI operating system to your USB drive. The application prompts you for your administrator password, to obtain privileges needed to write to the USB drive. Upon completion, you’ll see the following dialog:
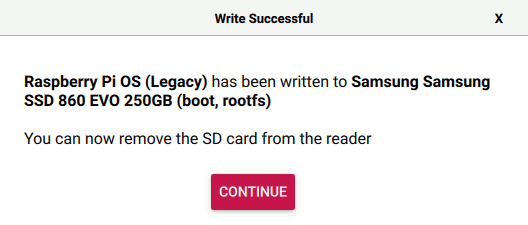
Ignore the fact that it mentions an SD card. We know that it was in fact a USB drive. Disconnect the USB drive from your PC and close the Raspberry PI Imager application.
Boot the Raspberry PI operating system from the USB drive
In the previous section we prepared the USB drive, by storing the image of the Raspberry PI operating system on it. Let’s try to boot the Raspberry PI 4 from the USB drive. Perform the following steps:
- Disconnect the power supply from your Raspberry PI.
- Insert the USB drive into a USB 2 port. So one of the black ones. Not the blue ones.
- Connect the power supply to your Raspberry PI.
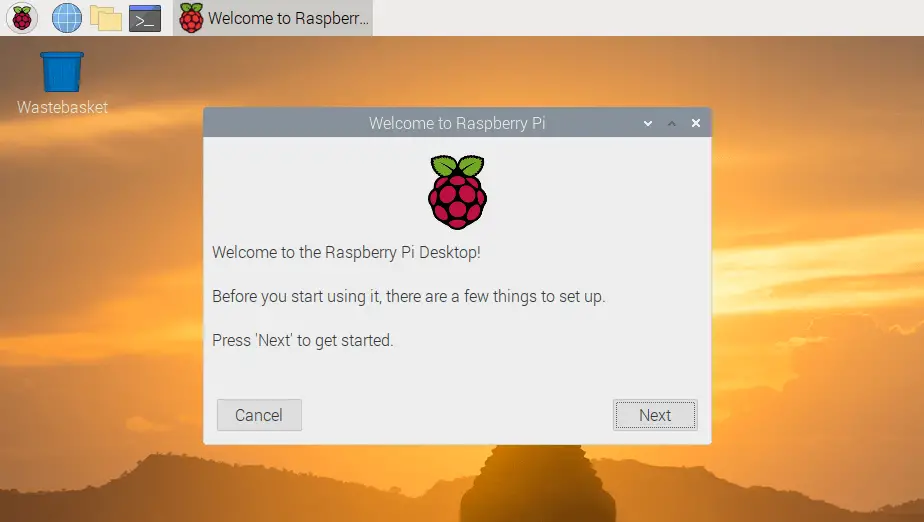
If all works okay, your Raspberry PI presents you with the default desktop environment on your display:
Why did we connect the USB drive to a slower USB 2 port, instead of a USB 3 port? It turns out that not all SATA to USB 3 adapters are compatible with the Raspberry PI 4. By first trying it on a slower USB 2 port, we can first verify that the boot from USB works on your Raspberry PI 4. If it did, then try USB 3 by following these steps:
- Shutdown the Raspberry PI operating system.
- Disconnect the power supply from your Raspberry PI.
- Insert the USB drive into a USB 3 port. So one of the blue ones this time.
- Connect the power supply to your Raspberry PI.
If your Raspberry PI 4 now boots as expected, then you are all set! The boot code stored in your Raspberry PI 4 EEPROM is already configured to supporting booting from a USB drive. If it didn’t work, continue reading for possible solutions.
Troubleshooting
When you ran into problems with booting your Raspberry PI 4 directly from the USB drive, this section offers troubleshooting assistance.
Your Raspberry PI 4 only boots when connected to USB 2
In case your Raspberry PI operating system only boots up properly, when connected to a USB 2 port, then the USB 3 adapter you use to connect your SSD drive is not compatible with the Raspberry PI 4. Refer to the following tutorial for a potential fix:
Your Raspberry PI 4 boots from USB 3 but you have mouse or keyboard issues
When operating a USB 3 device, it can cause interference with wireless devices such as a mouse or keyboard. There is no solution for this, merely two workarounds:
- Use a wired USB keyboard and mouse.
- Boot with your USB drive connected to a black USB 2 port on your Raspberry PI 4.
Your Raspberry PI 4 seems to boot but no desktop environment shows up
At the time of this writing, the Debian 11 “Bullseye” based Raspberry PI operating system was only just released. The community reported a few problems that could potentially result in your Raspberry PI not booting properly. If this happened to you, then you most likely saw information on the screen about the file system resizing and then an automatic reboot. Yet after this reboot, the screen remains black. The solution:
- Select the Debian 10 “Buster” based Raspberry PI OS (Legacy) version in the Raspberry PI Imager and write this image to your USB flash drive.
Your Raspberry PI 4 does not boot at all from a USB drive
If the other troubleshooting solutions did not resolve your problem, the boot code in your Raspberry PI EEPROM might not yet be configured to support booting from USB. This is most likely the case if you did not see anything appear on the display, when attempting to boot. Luckily, we can reconfigure the boot code EEPROM with the help of an SD card and the Raspberry PI Imager software. The following section explains this process.
Configure the Raspberry PI 4 to boot from USB
In this section you learn how to reconfigure the boot code, stored in the EEPROM chip of your Raspberry PI 4. Only continue with the steps if this section if the troubleshooting tips in the previous section did not solve your problem. As a starting point, disconnect the power supply from your Raspberry PI and unplug the USB drive from the USB port.
To configure the Raspberry PI 4 to boot from USB, we write a special bootable image to the SD card, which can update the boot code in the EEPROM chip. Sounds complicated, but the Raspberry PI Imager software makes this quick and easy. Go ahead and insert the SD card into your PC and start the Raspberry PI Imager application.
Select the bootloader image
On the application’s main window, click the CHOOSE OS button. Next, go to category Misc utility images → Bootloader. Here you see two options that support booting your Raspberry PI from USB:
- SD Card Boot – Boot from SD Card if available, otherwise boot from USB.
- USB Boot – Boot from USB if available, otherwise boot from SD Card.
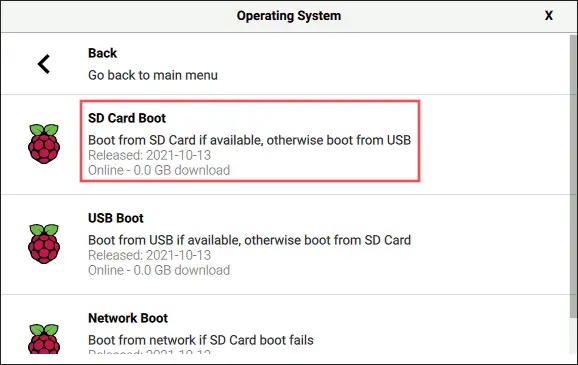
Both options work. They just use a different boot order. I opted for SD Card Boot, because I always remove the SD card anyways, when booting my Raspberry PI 4 from a USB drive. If you plan to keep the SD card inserted as well, then you should go for option USB Boot.
Write the bootloader image to the SD card
After selecting the operating system, click the CHOOSE STORAGE button and select your SD card. Important: Double-check that you selected the correct drive before proceeding, because the next step erases its contents!
Once you double-checked that you selected the correct drive, move forward by clicking the WRITE button. This writes the image of the selected Raspberry PI bootloader image to your SD card.
Update the Raspberry PI 4 boot code EEPROM
To update the boot code stored inside the EEPROM on your Raspberry PI 4, you just need to boot the bootloader image on the SD card once. Perform these steps to do so:
- Disconnect the power supply from your Raspberry PI.
- Make sure the USB drive is disconnected from the Raspberry PI.
- Insert the SD card into its slot on the Raspberry PI.
- Connect the power supply to your Raspberry PI.
The bootloader image now boots and writes your newly configured boot code to the EEPROM chip. This process only takes a few seconds. When done, the green LED on the Raspberry PI 4 starts to consistently blink about 5 times per second. This indicates that the EEPROM successfully updated. If you attached a display via HDMI, it will turn completely green to indicate the same.
At this point you successfully reconfigured your Raspberry PI 4 to support booting from a USB drive. Go ahead and disconnect the power supply from your Raspberry PI and remove the SD card. Next, attempt to boot from the USB drive again. You can find the instructions for this earlier in this article. Basically, just plug the USB drive into the USB port and connect the power supply. Try the black USB 2 port first. If that works, try again using a blue USB 3 port.
Wrap up
This tutorial presented you with all you need to know, in order to boot your Raspberry PI 4, 400 or Compute Module 4 directly from a USB drive. Running the Raspberry PI operating system from a USB drive gives you better disk I/O speed. This for example means that applications start faster. A welcome improvement, especially when using your Raspberry PI as a desktop PC. You also bypass possible SD card corruption problems.
The majority of Raspberry PI 4, 400 or Compute Module 4 boards support booting from USB out-of-the-box. You just need to write the operating system image to the USB drive, instead of an SD card. A piece of cake with the help of the Raspberry PI Imager software. In case you own a Raspberry PI 4 from a production batch right after its release, you might still need to enable the boot from USB feature. The last section in this article showed you how to perform this step. It involved reprogramming the code boot in the EEPROM on your Raspberry PI 4 board.
In case you own an older version Raspberry PI module (1, 2, 3 or Zero), you cannot directly boot from a USB drive, but you can still run the root file system (/) from a USB drive. In this case you only boot from the SD card. Booting from an SD card merely performs read operations, meaning that you won’t run into SD card corruption problems. You won’t get the same disk I/O speed improvements, because these older Raspberry PI models do not yet feature a USB 3 port.
If you enjoyed reading this article, you might be interested in other Raspberry PI related articles as well: