 by
by Looking for a way to display multiple terminals all in the same application window? Then the tmux terminal multiplexer might be right up your alley. In this tmux getting started tutorial, you’ll learn how to install tmux, how to open and close terminal panes, how to navigate between and inside terminal panes, and how to automatically start tmux when you open your terminal application.
Background
Daily driving Linux, compared to other operating systems, involves more terminal usage. Especially when administrating Linux servers through a remote SSH connection. This takes a bit of getting used to, yet it’s worth the learning curve. Most Linux distributions come packed with a plethora of powerful text-based user interface (TUI) and command-line (CLI) tools. To name just a few popular ones: vi, grep, find, awk, sed, mc , htop and tree. For this reason each Linux desktop environment ships with a terminal application, for example gnome-terminal, konsole and xfce4-terminal.
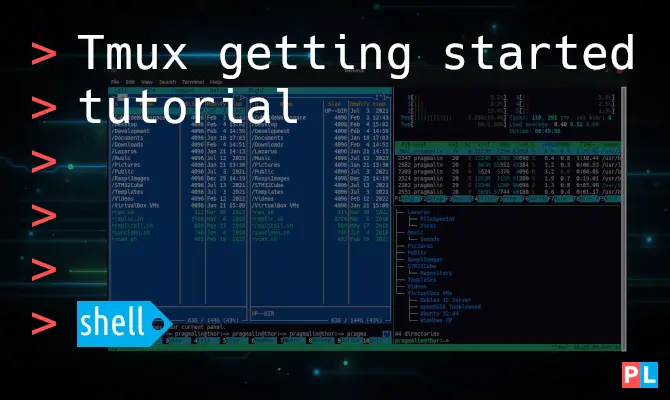
When working a lot in the terminal, you’ll soon find yourself in a situation where you opened multiple terminal windows and keep switching between them. Wouldn’t it be great it you could open multiple terminal views in the same terminal application? If you answered “yes” to this question, then check out tmux :
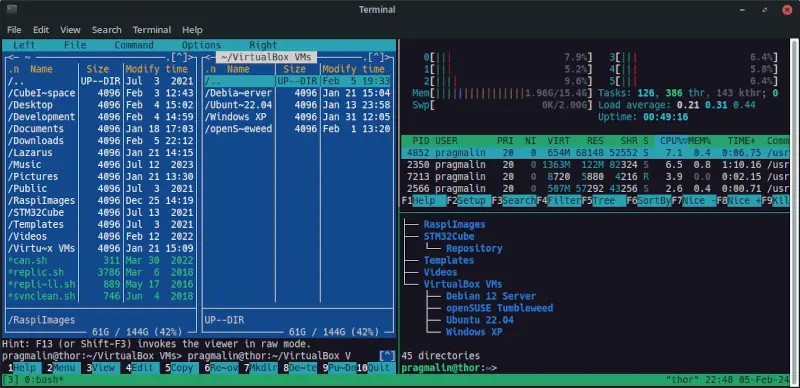
As the name implies, and the above screenshot showcases, tmux is a terminal multiplexer. It enables you to open and view multiple terminals in one and the same terminal window. Similar to what a tiling window manager, such as sway and i3, do for the entire desktop, yet applied to just the terminal window.
In this tmux getting started tutorial, you’ll learn how to:
- Install
tmuxon your Linux system. - Open and close terminal panes.
- Navigate between terminal panes.
- Scroll in a terminal pane.
- Automatically start
tmuxwhen opening your terminal application.
What do you need
To follow along with this tutorial in a hands-on manner, you just need a Linux system. Ideally one with a desktop environment, yet a headless system that you remotely access suffices. While working on this tutorial, I used my daily driver openSUSE Tumbleweed system. First installed over three years ago and happily rolling through the upgrades without hiccups. I can highly recommend openSUSE Tumbleweed. If you decide on giving openSUSE Tumbleweed a try, perhaps in a virtual machine, the following article might be of interest:
From a terminal application perspective, the screenshots highlight gnome-terminal. Simply because that’s my default terminal application. The steps outlined in this article should work just fine with all the other terminal applications that ship with Linux desktop environments.
Installing Tmux on your Linux system
All Linux distributions packaged tmux, meaning that you can install it the usual way with your Linux distribution’s package manager:
- Debian/Ubuntu:
sudo apt install tmux - Fedora:
sudo dnf install tmux - openSUSE:
sudo zypper install tmux
Opening and closing Tmux
To start tmux, open your preferred terminal application and type tmux and press Enter:
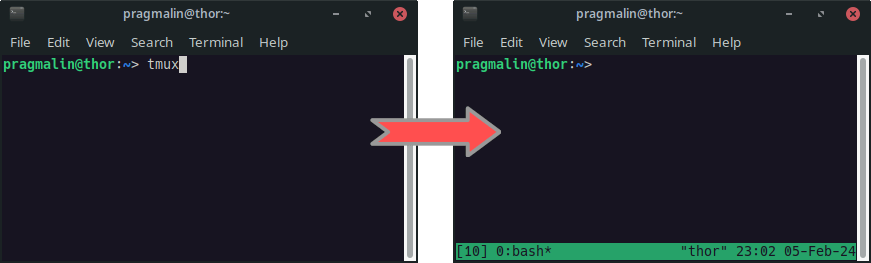
To close tmux, type exitand press Enter.
Tmux keyboard command sequences
All operations in tmux happen through keyboard commands. A command keyboard sequence always starts with the same prefix, followed by the actual command key. The default command prefix in tmux consists of Ctrl+b. For example, instead of typing exit to close tmux (or its active terminal pane), you can also type this keyboard sequence: Ctrl+b x.
Opening and closing terminal panes in Tmux
Generally speaking you can open new terminal panes inside tux in to ways: split panes horizontally and split panes vertically.
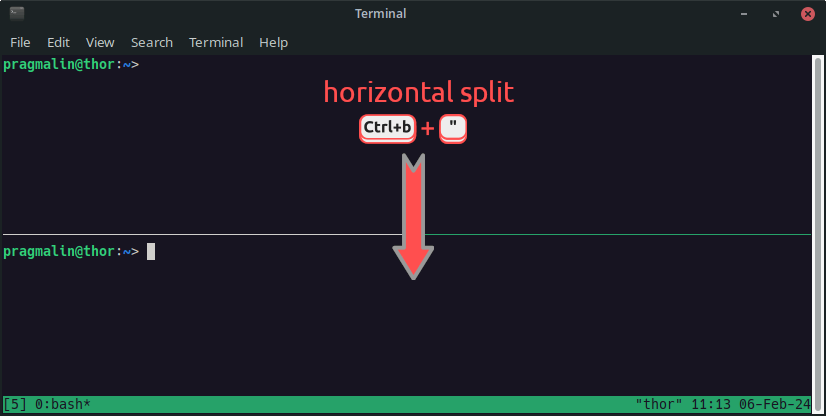
Split panes horizontally
To split panes horizontally, use the keyboard sequence: Ctrl+b ":
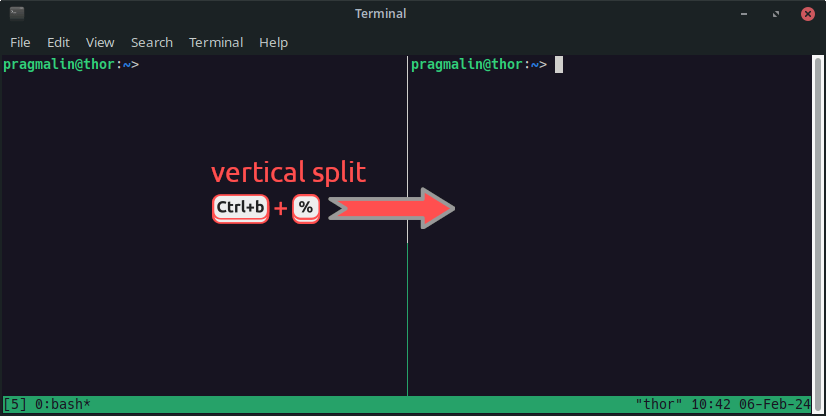
Split panes vertically
To split panes vertically, use the keyboard sequence: Ctrl+b %:
Navigating between terminal panes in Tmux
After performing a split operation, tmux automatically sets the newly created pane as the active pane. One of the first things you’ll wonder about: How to switch between the different panes in tmux? Moving the mouse cursor inside a pane and then clicking to activate the pane, does not work. Remember that everything in tmux is controlled via keyboard command sequences.
The keyboard command sequence for navigating between panes, consists of the command prefix Ctrl+b. Followed by an arrow key ↑ ↓ ← →, based on the location of the pane you want to activate:

Scrolling inside a Tmux terminal pane
Because tmux works completely with keyboard command sequences, this also means that you can no longer scroll up through text using the mouse wheel or the scrollbar of the terminal window. To scroll up or down in tmux, you need to briefly enter the so called copy mode: Ctrl+b [. You can now scroll through the text with the PgUp and PgDown keys and also with the arrow keys ↑ ↓ ← →. To exit copy mode, use the q key.
Automatically start Tmux when opening the terminal application
Once you get the hang of tmux you might get to the point where you want to always to start tmux when you open up your terminal application. Several ways exist to do this directly in your .bashrc file. One example is here. I tried a few of these solutions, but decided against auto-starting tmux through .bashrc for the following reason: At one point I ran into a situation where I could no longer log into my graphical desktop environment. It just kept looping back to the login screen.
When you run your terminal application on your Linux desktop environment, so not on a headless system, I recommend the following solution for automatically starting tmux when you open your terminal application: Adding the -e tmux command-line parameter to the desktop launcher. Here’s how to do it for gnome-terminal. The steps should be similar for other terminal applications.
Start by copying your system’s global desktop launcher to one for just your user:
mkdir -p ~/.local/share/applications/cp /usr/share/applications/org.gnome.Terminal.desktop ~/.local/share/applications/org.gnome.Terminal.desktop
Next edit the newly copied file with a text editor. For example nano:
nano ~/.local/share/applications/org.gnome.Terminal.desktop
Find the line with Exec=gnome-terminal and change it to:
Exec=gnome-terminal -e tmux

The next time you start your terminal application, for example by selecting it from your desktop environment’s start menu, tmux automatically starts.
If for some reason this above does not work, you can alternatively create a tmux specific desktop launcher file:
nano ~/.local/share/applications/tmux.desktop
With the following contents:
[Desktop Entry]
Name=Tmux Terminal
Comment=Use the command line
Keywords=shell;prompt;command;commandline;cmd;
Exec=tmux
Icon=org.gnome.Terminal
Type=Application
Categories=GNOME;GTK;System;TerminalEmulator;
SingleMainWindow=false
Path=
Terminal=true
Tmux tutorial wrap up
After working your way through this getting started tutorial, you know the basics of working with tmux. Just by memorizing the handful of presented keyboard command sequences, you now know how to multiplex your terminal. Hopefully leading to a more comfortable and productive terminal experience on your Linux system.
Keep in mind that tmux can do much more than what was presented in this article. A good follow-up resource to continue learning is the tmux MAN-page. Run man tmux from the terminal to access it. Alternatively, point your web browser to the online version.