 by
by Do you prefer a basic username and password combo for accessing your GitHub repositories? No problem. Just make sure you clone using the HTTPS URL. One snag though: Starting August 13th of 2021, GitHub no longer allows you to authenticate using your account’s username and password. Instead of a password, you now need to specify a personal access token. This article explains how to create a GitHub personal access token and how to store it on your Linux PC.
Background
As a developer you access your GitHub repository either via HTTPS or SSH. When cloning the repository to your PC, you make the decision on the access method: If you clone with the URL that starts with https: then you selected HTTPS, SSH If the clone URL starts with git@github.com:. Both methods work fine, the only difference lies in the authentication method.
Authenticating via SSH requires an SSH public/private key pair. This involves generating the key pair, registering the private key with your operating system and uploading the public key to your GitHub account. The benefit of SSH authentication is the security. The SSH public/private key combo is hard to crack. As a downside it involves a bit of setup work. More importantly, not all PC operating systems natively support the use of SSH keys. Not an issue on Linux, but definitely a bit trickier on Windows. You need to install the Putty tools to make it work on Windows.
To make authentication easier, GitHub also supports access with your account’s username and password. In this case you need to clone using the HTTPS method for accessing your repositories. However, it is not as secure. Out of convenience, users more often than not reuse the same username and password for different accounts on the Internet. If one of these accounts gets hacked, the culprit can potentially access your GitHub account and repositories.
For this reason, GitHub no longer supports password authentication since August 13th of 2021. Instead of a password, you need to use a personal access token.
Personal access token
At first sight a personal access token is nothing more than a long and secure password. You even use it the same way. When cloning a private GitHub repository or committing changes to a GitHub repository, you simply use your account’s username and then specify the personal access token, when prompted for the password.
Compared to a password, a personal access token offers two major benefits:
- Your personal access token is unique for your GitHub account and not used for other accounts on the Internet. Making it a more secure option.
- With a personal access token you can configure a more fine-grained access control for the resources of your GitHub account.
This article walks you through the steps of creating your GitHub personal access token, for accessing your GitHub repositories, both public and private, via HTTPS. I’ll also explain how you can store your GitHub personal access token locally on your Linux PC, so you won’t need to enter it each time you access your repository.
What do you need
To follow along with the steps in this article, you just need a Linux PC with:
- A desktop environment of your choice.
- Access to the Internet and a web browser.
- The Git packages installed.
All Linux desktop distributions cover items 1 and 2. Some also already install the Git packages. If not, here follow the installation instructions for popular Linux distributions:
- Debian/Ubuntu/Raspberry PI:
sudo apt install git - Fedora:
sudo dnf install git - openSUSE:
sudo zypper install git
For this article, I’ll use an openSUSE Tumbleweed virtual machine which comes with the Firefox web browser and I installed the XFCE desktop environment.
Create a GitHub personal access token
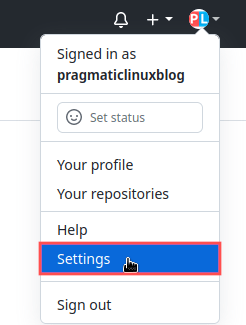
In this section we’ll cover the creation of a new GitHub personal access token. Point your web browser to your account on the GitHub website and log in. Once logged in, click on your account icon located in the top-right corner. From the menu that appeared, select Settings:
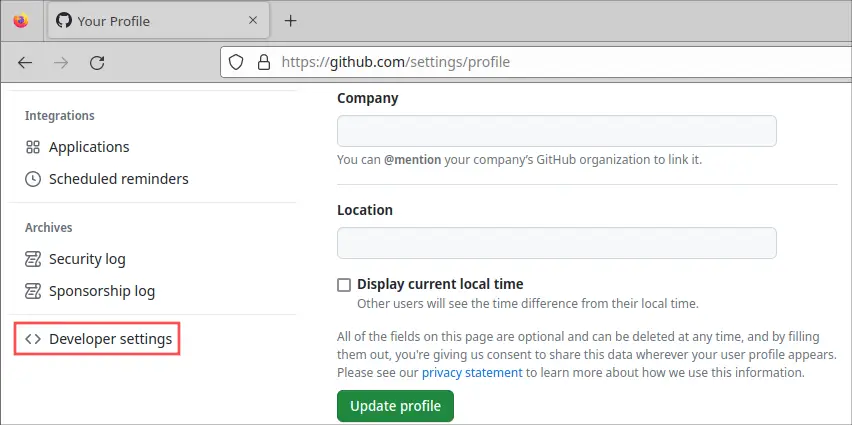
Your account profile page appears. Scroll down a bit and click on the Developer settings category:
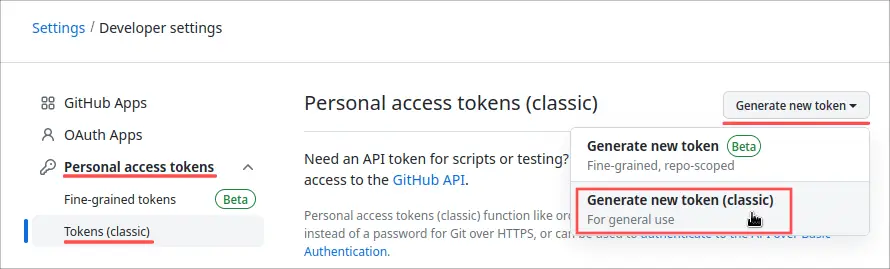
On the newly appeared Developer settings page, navigate to section Personal access tokens → Tokens. Next, click the Generate new token button and select the option Generate new token (classic):
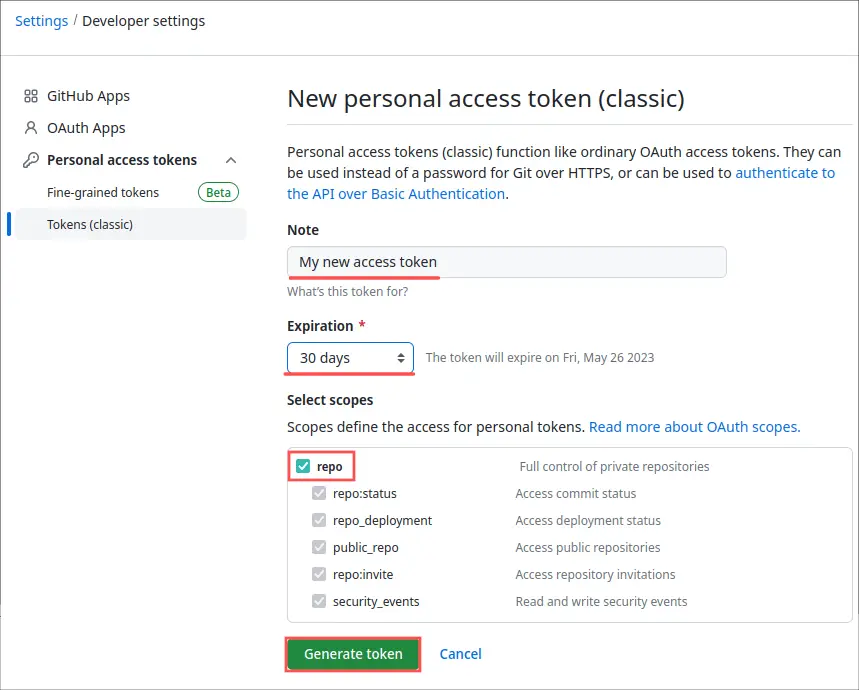
On the New personal access token page, enter a Note of your choosing and make sure to check the repo check-box. That way you can use your newly created personal access token for accessing both your public and private GitHub repositories. Optionally, you can change the token’s expiration date. This determine how long the personal access token can be used. I typically set it to one year, but that decision is up to you. Click the Generate token button at the bottom to go ahead with the actual GitHub personal token creation:
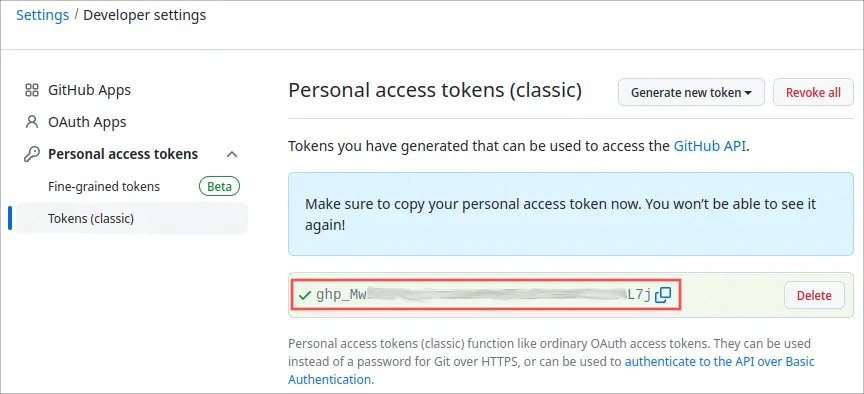
On the next page, GitHub presents you with your newly generated personal access token. Make sure to copy it and store it somewhere save, for example in a password manager, and don’t share it with anyone else. Once you leave this page on the GitHub site, you will no longer be able to see it again:
Test your new GitHub personal access token
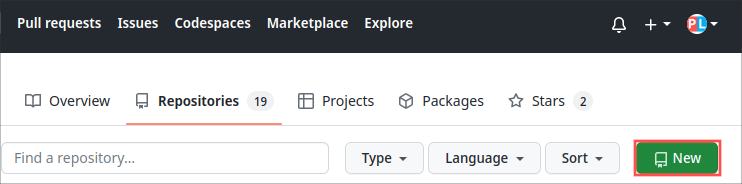
With the GitHub personal access token created, we can give it a try by cloning a private GitHub repository. You probably already setup a private repository at some point in your GitHub repository. If not, you can quickly create one just for testing purposes. You can always delete it again afterwards. To do so, click the New button on the Repositories page:
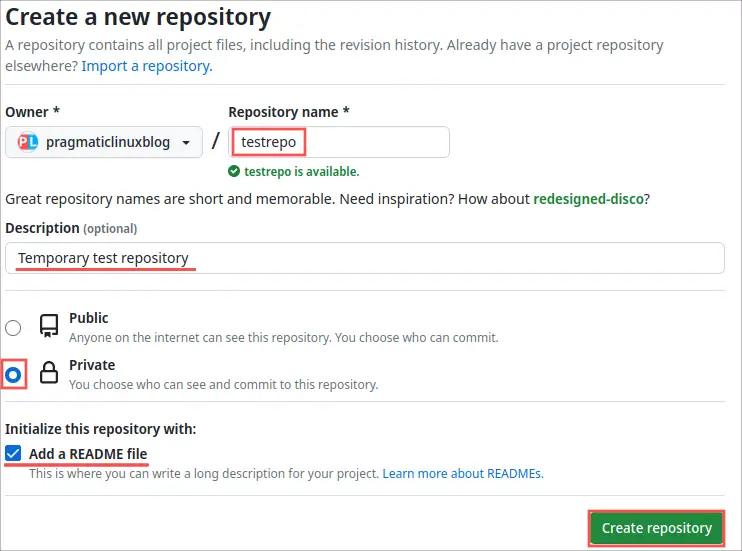
On the Create a new repository page, enter a repository name. I went for testrepo. Next enter a description, make sure to select Private repository and check the box to add a README file. That way the repository is not empty and we actually have something to clone. Once you entered all this repository information, click the Create repository button:
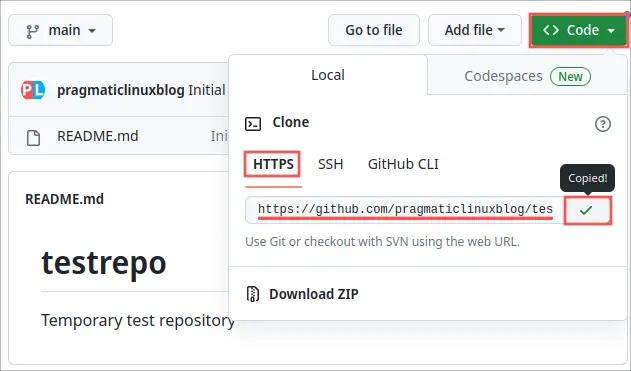
After its creation, GitHub automatically redirects you to the newly created repository. Before we can clone the repository, we need to determine its HTTPS URL. Click on the Code button and select HTTPS. Next, copy the URL that appeared. In my case:
https://github.com/pragmaticlinuxblog/testrepo.git
To continue with the repository cloning, open up your terminal and enter the following command. Make sure to replace the URL, with the URL of your repository:
git clone https://github.com/pragmaticlinuxblog/testrepo.git ~/MyTestRepo
When prompted for your username, enter your GitHub account username. More importantly, when asked for your password, enter your newly created personal access token:
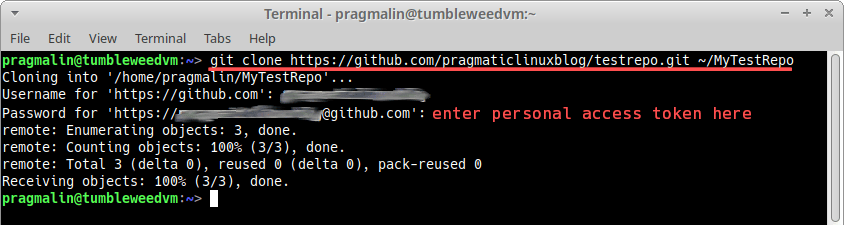
If the cloning does not report any errors, you successfully verified that your newly created GitHub personal access token works.
Store your GitHub personal access token
One disadvantage of working with a GitHub personal access token: You need to specify your username and personal access token each time when accessing your remote repository. For example when cloning, pulling, pushing, etc. Luckily, GIT includes a credential helper. With the GIT credential helper you can store your username and personal access token credentials.
Store GitHub credentials in a file
The easiest (and least secure) way to do this, is by simply creating a text file in your home directory, with the name .git-credentials:
nano ~/.git-credentials
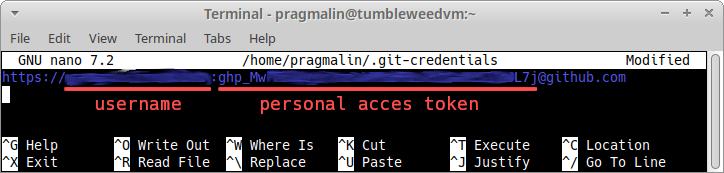
Next, enter the following on the first line. Make sure to replace user with your account’s username and pass with your personal access token:
https://user:pass@github.com
As a final step, we inform GIT that we would like to authenticate using the credential in this file. You do so, by running this command in the terminal:
git config --global credential.helper store
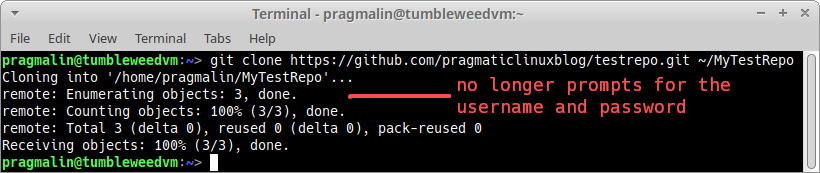
To test that it works, repeat the cloning of the test repository. You’ll notice that GIT now no longer asks for the username and password:
Store GitHub credentials in the GNOME keyring
When using a GTK based desktop environment, such as GNOME, Cinnamon, XFCE, Mate and Budgie, you can store passwords and keys in the GNOME keyring. A really handy feature is that you can also store your GitHub credentials in the GNOME keyring. How to link your GitHub credentials to your GNOME keyring depends a bit on the Linux distribution that you run. The installation and configuration instructions for popular Linux distributions:
openSUSE
sudo zypper install git-credential-libsecretgit config --global credential.helper /usr/libexec/git/git-credential-libsecret
Debian/Ubuntu/Raspberry PI
sudo apt install make gcc libsecret-1-0 libsecret-1-devcd /usr/share/doc/git/contrib/credential/libsecretsudo makegit config --global credential.helper /usr/share/doc/git/contrib/credential/libsecret/git-credential-libsecret
Fedora
sudo dnf install git-credential-libsecretgit config --global credential.helper /usr/libexec/git-core/git-credential-libsecret
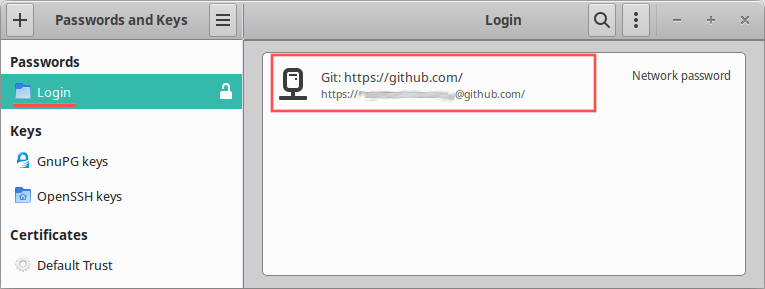
The next time your perform a GIT operation, requiring credentials, the credential helper stores the username and personal access token in your GNOME keyring. For subsequent GIT operations, your credentials are automatically taken from the stored values in your GNOME keyring. To change or delete the credentials stored in the GNOME keyring, you can use a GUI tool such as Seahorse:
Wrap up
This article explained how to create and use a personal access token for your GitHub account. Ever since the 13th of August 2021, you need to specify your personal access token, instead of your account’s password, when accessing your GIT repository using the HTTPS URL. Additionally this article showed how to store your GitHub credentials (username and personal access token) on your Linux PC. That way you only need to specify your credentials once and your system remembers them for the future.
If you work with GIT and GitHub on a regular basis, you might be interested in one of the other GIT related articles: