 by
by Interested in running Xubuntu on your Raspberry PI, but you can’t find an installation image for it? That’s because the Xubuntu team doesn’t offer it for the Raspberry PI’s ARMv7/v8 architecture. This doesn’t mean it’s impossible. With a few tricks you can get this Ubuntu based and lightweight XFCE desktop distribution working on your Raspberry PI. It’s not even that much work. Read on for detailed instructions on getting Xubuntu running on your Raspberry PI.
Background
Ubuntu offers a flavor of its desktop Linux distribution based on the XFCE desktop environment, aptly called Xubuntu. It combines the stable Ubuntu base with the lightweight XFCE desktop environment, which requires little CPU and RAM resources. Yet it offers a full-featured, highly configurable and theme-able desktop experience, with a classical user interface. This makes working with Xubuntu on your daily desktop machine a pleasurable experience, especially for older and less powerful PCs.
The lightweight XFCE desktop environment combined with the stable Ubuntu base, makes Xubuntu also an excellent candidate to run on a Raspberry PI. Sure, you can install the XFCE desktop on top of the standard Debian based Raspberry PI operating system. PragmaticLinux even featured this in a previous article:
However, several reasons exist that make you want to run Xubuntu on your Raspberry PI instead:
- The Xubuntu team applied their theming and configuration to the XFCE desktop environment, including the Whisker menu. This makes it more appealing to work with, compared to the plain vanilla XFCE version you get when installing XFCE on top of the Raspberry PI operating system.
- You already run an Ubuntu flavor or one of its derivatives on your desktop PC. You might therefore prefer an equivalent setup on your Raspberry PI.
- As you’ll see in this article, getting Xubuntu up-and-running is actually easier than installing XFCE on top of the standard Raspberry PI operating system.
Unfortunately, the Xubuntu team only offers an installation image for 64-bit Intel/AMD based PCs, not one for the ARMv7/v8 architecture of the Raspberry PI. Nothing to worry about, because this article shows you step-by-step how to install Xubuntu on your Raspberry PI.
What do you need
To complete the steps in this article and install Xubuntu on your Raspberry PI, you need the following:
- Any Raspberry PI board, ideally one with 2 GB RAM or more.
- Power supply for the Raspberry PI board.
- Micro-SD card of 8 GB or more in size.
- A USB mouse and keyboard.
- Computer monitor or TV.
- Cable for connecting the HDMI output to your monitor or TV.
I’ll be using my Raspberry PI 4 with 4 GB RAM to install Xubuntu, which is what’s you’ll see in the screenshots.
You also need a PC for writing the operating system image to your SD card. We’ll use the Raspberry PI Imager software for this, which runs on Linux, Windows and macOS.
Write the Ubuntu server image to your SD card
First, we’ll install a minimal Ubuntu server operating system on our Raspberry PI and afterwards we’ll install the Xubuntu related packages on top of that. Alternatively, we could start with an Ubuntu desktop operating system. However, then we’ll end up with both the GNOME and the XFCE desktop environments. This works fine, except that we only want XFCE and do not need GNOME.
This section assumes that you already installed the Raspberry PI Imager software on your PC. You can download Windows, macOS and Ubuntu installers from the software section on the Raspberry PI website. Refer to the following article for installing the Raspberry PI Imager software on different Linux distributions:
Note that the remaining steps in this section erase the contents of your SD card. Make a backup first, if it contains important data. If your SD card contains another Raspberry PI operating system, which you would like to potentially restore later on, refer to this article on how to clone it for this purpose:
Select the operating system and storage
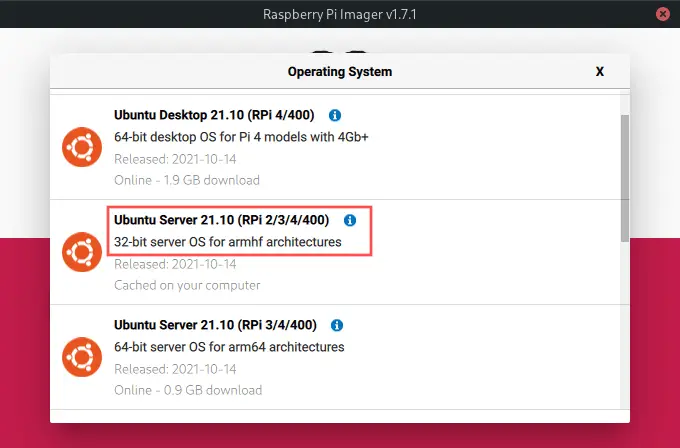
Make sure you inserted your SD card into your PC and start the Raspberry PI Imager software. First we select the operating system by clicking the CHOOSE OS button on the user interface. Next, select Other general-purpose OS → Ubuntu → Ubuntu Server 21.10. A newer version, such as the upcoming 22.04 LTS release, should work too. Note that I could not get Xubuntu working on a 20.04 LTS base, so don’t pick that one. The 32-bit edition works fine on all Raspberry PI models. If you own a Raspberry PI 3, 4, or 400, you could also go for the 64-bit edition for slightly increased performance:
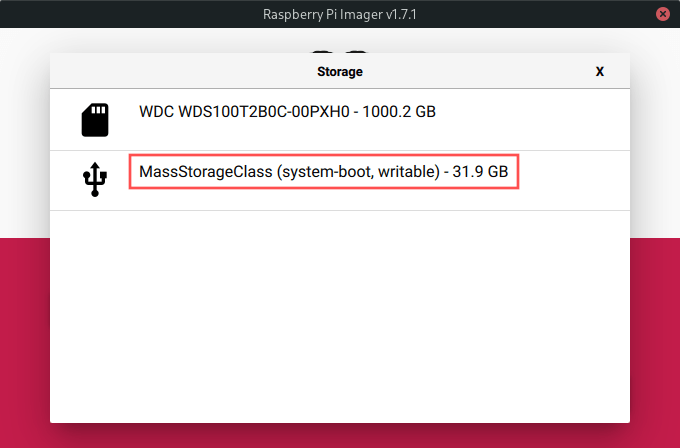
Next, click the CHOOSE STORAGE button on the user interface to select your SD card as storage. In my case it’s a 32 GB SD card. Just make sure to double-check that you select your actual SD card here and not accidentally another disk on your PC.
Configure the advanced options
On the Raspberry PI Imager software version 1.7 or higher, you’ll now see a button with a little gear wheel icon on the application’s main screen. Click that one to access the Advanced options dialog. On older versions of the Raspberry PI Imager software, you access this (hidden) dialog by pressing the CTRL + SHIFT + x combination on your keyboard.
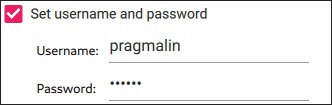
Enable the Set username and password check-box and enter your preferred username and password combination:
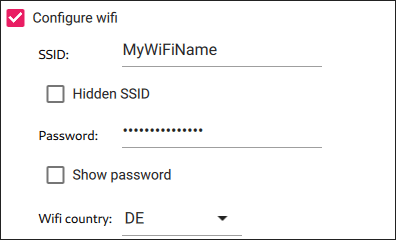
If you plan on using WiFi to connect your Raspberry PI to the Internet, enable the Configure wifi check-box and enter your network’s name (SSID), the password and select the country you are in:
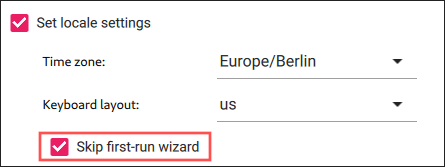
Next, enable the Set locale settings check-box and select your time zone and preferred keyboard layout. Make sure to also check the Skip first-run wizard:
Click the Save button at the bottom of the dialog to store these changes and return to the application’s main screen.
Write the image to your SD card
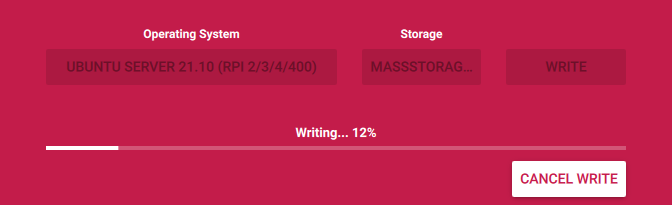
Once back on the main screen of the Raspberry PI Imager, click the Write button. This starts the process for writing your selected and configured Ubuntu server operating system to the SD card.
Upon successful completion of the write operation, the Raspberry PI Imager presents you with the following dialog:
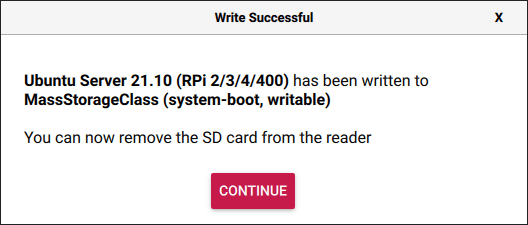
Click Continue and remove the SD card from your PC.
Boot and update your Ubuntu server based Raspberry PI
With the SD card prepared for running the Ubuntu server operating system, we can give it a try. Make sure that you disconnected the power supply from your Raspberry PI. Next, insert the SD card into the SD card slot on your Raspberry PI. Assuming that you already connected your Raspberry PI to your monitor or TV and attached your USB keyboard and mouse, connect the power supply to your Raspberry PI. This boots the Raspberry PI operating system for the first time. You can follow its progress on your screen.
If you don’t see anything appear on the screen and your Raspberry PI model features more than one HDMI output, try again using the other HDMI output.
Once booting completed, it presents you will the login prompt. Enter your username and password. It’s the one you specified on the advanced options dialog previously. After successful login, it should look something like this:
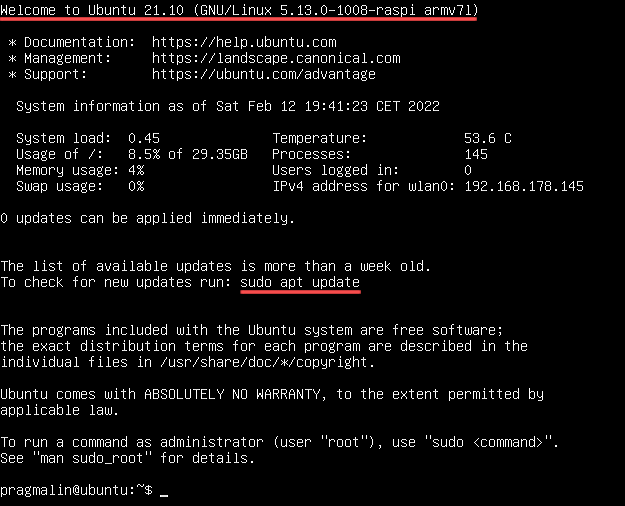
As the information on the screen recommends, we should first do a system update, before installing anything else. Start by checking which package updates are pending, by running command:
sudo apt update
If the output of this command mentions that certain packages can be upgraded, run the following command to start the upgrade procedure:
sudo apt upgrade
And hit ENTER to confirm that you want to continue with the upgrade.
Install Xubuntu on top of Ubuntu server on your Raspberry PI
In the section the real magic happens. We morph our Raspberry PI Ubuntu server installation into Xubuntu. Sounds complicated? Well, it’s not. All you need to do is run this command:
sudo apt install xubuntu-desktop
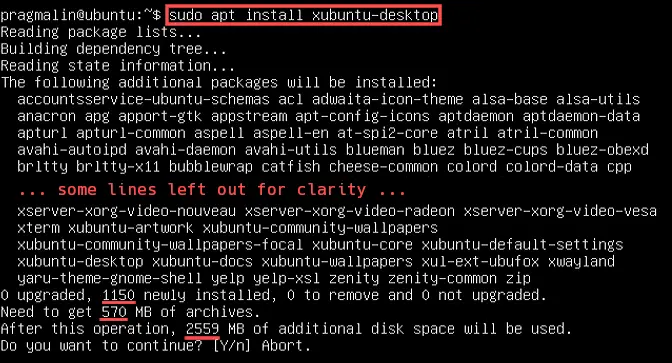
Note that this installation of Xubuntu on your Raspberry PI comprises of over 1100 packages, which requires a bit over 2.5 GB of space on the SD card. Not an issue, just be forewarned that it will take some time for this operation to complete. Hit ENTER to start the actual installation of Xubuntu on your Raspberry PI. As a reference, on my Raspberry PI the Xubuntu installation took about half an hour.
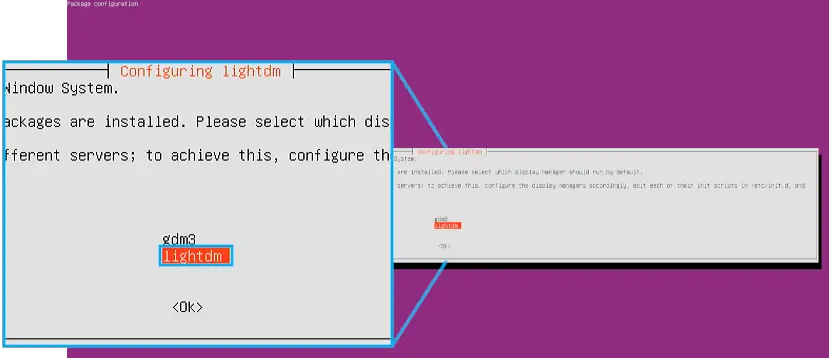
During the installation, you just need to answer which display manager you prefer: gdm3 or lightdm. Either one works, however lightdm is more common when installing XFCE. Therefore, I recommend sticking with lightdm. It’s not that important. It basically just determines how your login screen looks. Press the ↓ arrow key and hit ENTER to select the lightdm display manager.
Boot Xubuntu on your Raspberry PI
After completion of the package xubuntu-desktop installation on your Raspberry PI, you just need to reboot and you’ll be presented with the graphical login screen for your Xubuntu system. Reboot your Raspberry PI using command:
sudo reboot
Once the login screen appears, log in using your credentials:
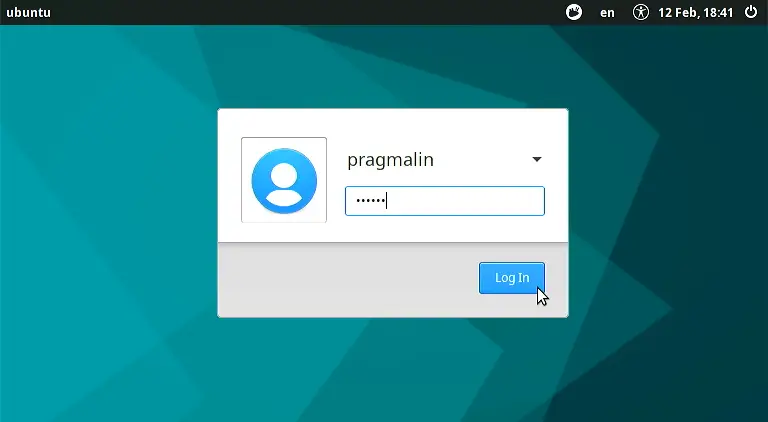
After logging in, your Raspberry PI presents you with your shiny new Xubuntu XFCE desktop environment:

It includes all the tools and applications needed, for using it as a desktop PC, including:
- Thunar file manager
- Firefox web browser
- Thunderbird e-mail client
- XFCE terminal
- GIMP image editor
- Mousepad text editor
- Ristretto image viewer
- Parole video player
- Rhythmbox music player
- Atril PDF viewer
The only thing missing in my opinion is the LibreOffice suite. Fortunately, you can quickly install this with command:
sudo apt install libreoffice
Wrap up
In this tutorial you learned step-by-step how to install Xubuntu on your Raspberry PI. We started with the Ubuntu server image as a minimal install. Afterwards we installed the xubuntu-desktop meta-package on top of it. As the end result, we now have a fully functional Xubuntu distribution running on our Raspberry PI, even though the Xubuntu team themselves do not offer an installation image for the Raspberry PI’s ARMv7/v8 architecture.
For more Raspberry PI related articles, follow this link: