 by
by Interested in developing C# applications on and for Linux? This article explains how to setup a full-featured C# development environment. It consists of the Visual Studio Code editor and the .NET Core SDK, needed to develop and run C# applications on Linux.
Background
Last week I worked on a project, which involved developing software in C#. I heard about C#, but never actually coded in C# before this project. It surprised me how quickly I found my way around the C# programming language. C# feels like it combines all the good things of Java and Object Pascal, mixed with the familiar syntax of C. As a true Linux aficionado, I wondered: “Can I develop C# software on Linux”?
It turns that you can. Quite well actually. Microsoft offers .NET Core for Linux. Combined with the Visual Studio Code editor and its C# extension, you can setup a wonderful C# development environment on Linux.
The .NET Core developer platform includes tools, libraries and a runtime environment needed to develop and run C# applications. This developer platform is called the .NET SDK. SDK stands for software development kit. Note that if you just want to run C# applications, you do not need the entire .NET SDK. The so called .NET runtime suffices in this case.
In this article you learn how to install the Visual Studio Code editor and the .NET SDK, allowing you to develop C# applications for Linux. After completing the installation steps, I’ll also show you how to create a basic “Hello World” console application. To the point that you build, run and debug it.
What do you need
The only thing you need, while working your way through this article, is a Linux system with desktop environment. It can be an actual PC or a virtual machine. Personally, I prefer trying things out on a virtual machine first. For this reason I decided on using Ubuntu 20.04 Budgie, running as a virtual machine in VirtualBox. This means the instructions target Ubuntu 20.04. However, I’ll include links and references in case you run a different Linux distribution.
Install Visual Studio Code on Linux
According to the Visual Studio Code website, you can install Visual Studio Code in two different ways:
- As a Snap package from the Snap store.
- Using your Linux distribution’s package manager.
My personal preference goes out to option two. Snap packages themselves are fine. I just don’t like it that they update in the background, without you knowing about it. It gives me Windows 10 flashbacks. But that’s just me.
To install Visual Studio Code through the Debian or Ubuntu package manager, we can download the DEB package from the Visual Studio Code website. Download the RPM package instead, if you run Fedora or openSUSE.
Download the Visual Studio Code editor DEB package
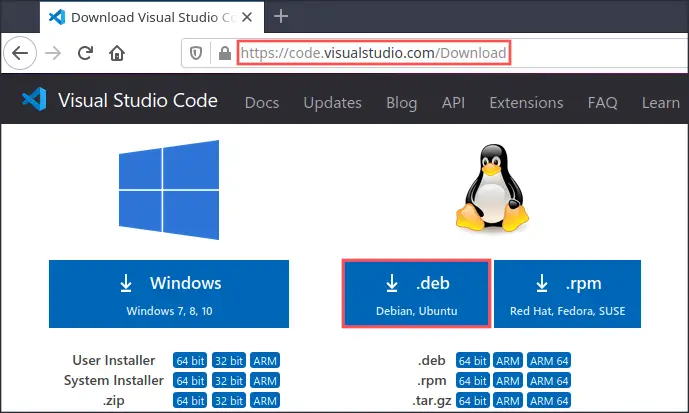
Visit the download page on the Visual Studio Code website. Next, click on the .deb link to download the Visual Studio Code editor’s DEB package:
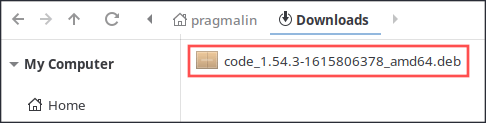
After the download completes, the DEB package shows up in your ~/Downloads directory. In my case its name is code_1.54.3-1615806378_amd64.deb:
Install the Visual Studio Code editor DEB package
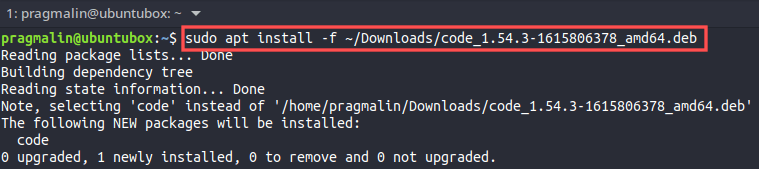
To install the downloaded Visual Studio Code DEB package, open up the terminal and run the following command. Just remember to adjust the name of the DEB file, in case it has a different filename on your system.
sudo apt install -f ~/Downloads/code_1.54.3-1615806378_amd64.deb
If you are new to directly installing DEB packages, refer to the tutorial about manually installing a DEB package on Debian or Ubuntu.
Install the C# for Visual Studio Code extension
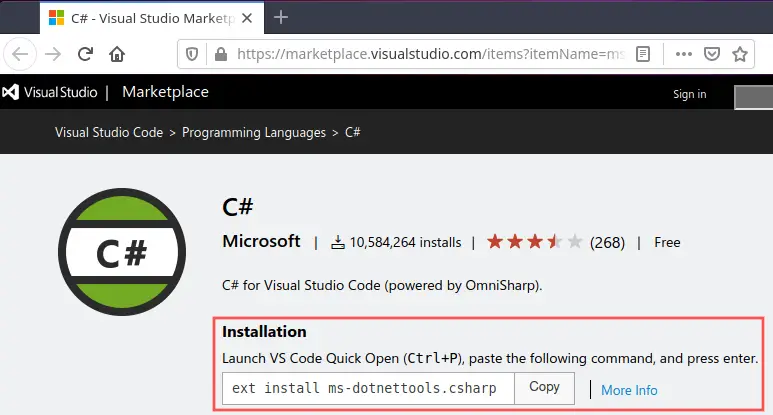
By default, Visual Studio Code for Linux does not yet support C#. Luckily we can add C# support to Visual Studio Code by installing an extension. You can find the C# extension (and other extensions) on the Visual Studio Code market place website. Open this link in your web browser to go directly to the C# extension page:
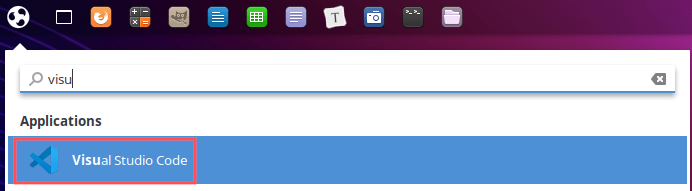
The C# extension web page tells us exactly how to install the extension. Go ahead and start Visual Studio Code. The installer automatically added an application launcher to your application menu:
Once opened, press CTRL + P on the keyboard. An edit box pops up. Enter (or copy/paste) the text ext install ms-dotnettools.csharp into this edit box and press ENTER on the keyboard:

With the C# for Visual Studio Code extension installed, we continue with the installation of the .NET SDK for Linux in the next section.
Install the .NET SDK for Linux
At this point we installed a C# capable programmer’s editor. In consists of the Visual Studio Code editor combined with the C# extension. The only missing puzzle piece to complete our C# development environment, is the actual .NET SDK. It contains the tools, libraries and runtime environment needed to develop and run C# applications.
When writing this article, .NET version 5.0 was the latest stable release. We’ll go ahead and install the .NET 5.0 SDK on Ubuntu 20.04. Refer to the Microsoft .NET website for instructions, in case you use a different Linux distribution.
Install required dependencies
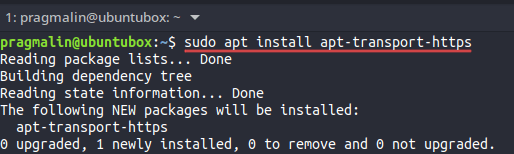
Installing the .NET SDK requires HTTPS support for the APT package manager. Therefore we first need to install the apt-transport-https package. Open the terminal and run the command:
sudo apt install apt-transport-https
Install the .NET SDK package repository
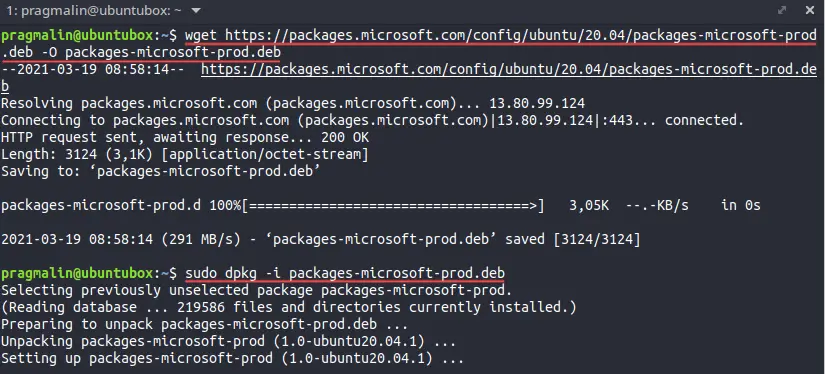
Next, we install the .NET SDK package repository onto our system. With the terminal still open, run the following commands. It adds the Microsoft package signing key to your list of trusted keys. Additionally, it adds the package repository from which we can later on install the .NET 5.0 SDK:
wget https://packages.microsoft.com/config/ubuntu/20.04/packages-microsoft-prod.deb -O packages-microsoft-prod.debsudo dpkg -i packages-microsoft-prod.deb
Install the .NET SDK package
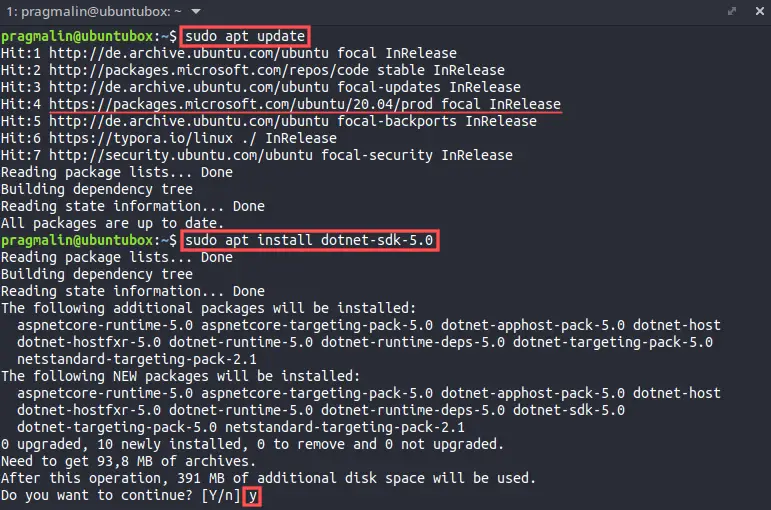
With the .NET SDK package repository added to our system, we can update the package repository information on our system. Then as a final step, install the actual .NET 5.0 SDK. In the terminal, run the following two commands to complete the installation of the .NET 5.0 SDK:
sudo apt updatesudo apt install dotnet-sdk-5.0
Create a C# console application with Visual Studio Code
Now that we completed the installation of Visual Studio Code and the .NET SDK on our Linux system, it’s about time we take it for a spin by creating our first C# console application.
Create a new C# project
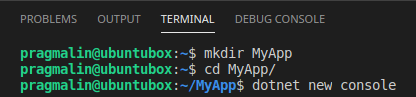
Start Visual Studio Code and select Terminal → New Terminal from the program menu. From the new terminal window, we can create a C# console application by running these commands:
mkdir MyAppcd MyAppdotnet new console
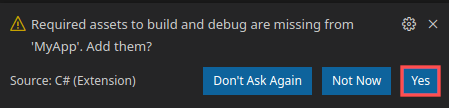
With the new project created, we can open it. From the program menu, select File → Open Folder and select the MyApp directory. Visual Studio Code automatically identifies it as a C# project and downloads necessary dependencies, such as the .NET Core debugger for Linux. When completed, a dialog appears and asks if you want to add assets to build and debug the application. Make sure so select Yes here:
Build and run the C# application
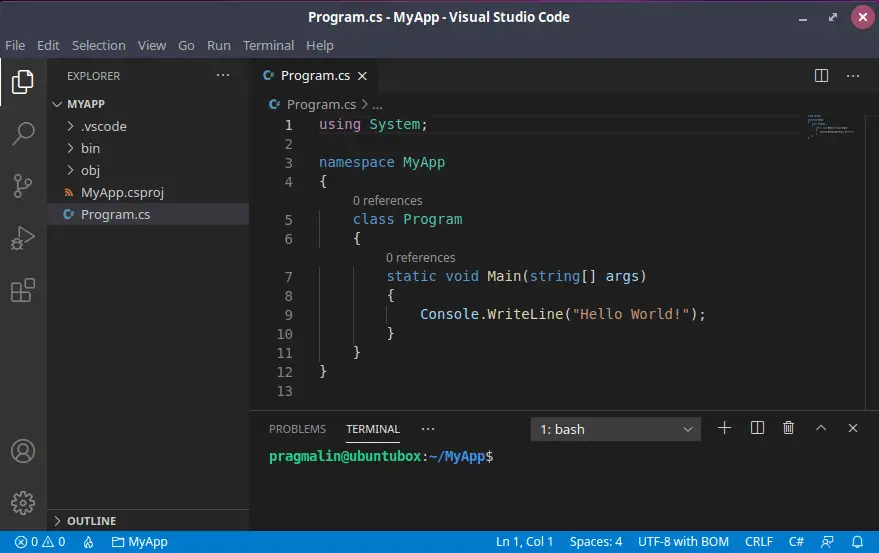
When the dotnet tool created the new C# console application, it automatically added a Hello World type program in Program.cs. You can use this as a starting point for your C# console application development. Here’s what the created C# project looks like in Visual Studio Code on Linux:
Before we can build the C# application, we need to configure the so called default build task. From the program menu, select Terminal → Configure Default Build Task. A small menu with available build tasks appears. Select build from this menu:

With the default build task configured, we can build our C# application by selecting Terminal → Run Build Task from the program menu. Alternatively, you can press CTRL + SHIFT + B on the keyboard. You can follow the build progress in the terminal window.
With the C# application built, you can run it by selecting Run → Run Without Debugging from the program menu. If you prefer keyboard shortcuts, you can press CTRL + F5 instead. The output of the console application appears in the Debug Console window:

Note that the C# application automatically builds before it runs, so there is no need to always explicitly build it first.
Debug the C# application
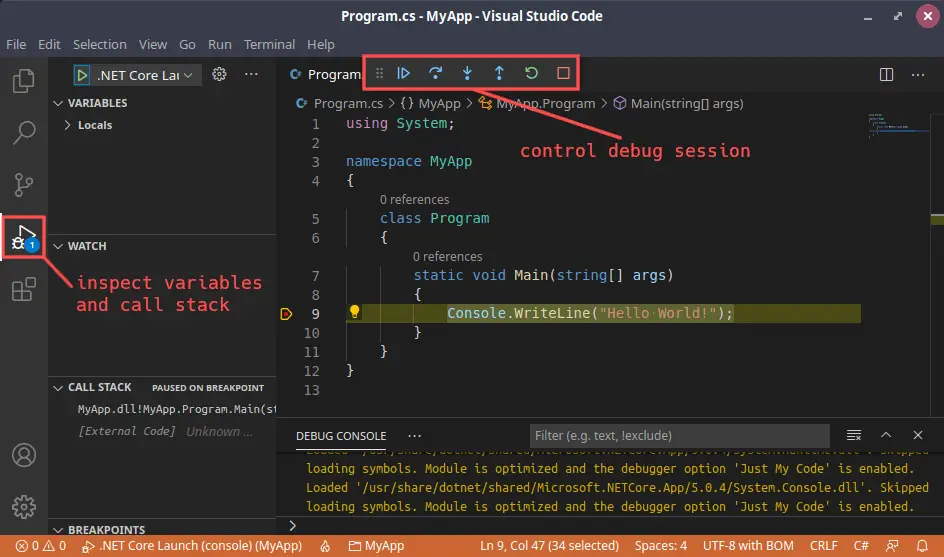
No integrated development environment is complete without debugging capabilities. Luckily, our solution with Visual Studio Code for developing C# applications on Linux, offers build-in debugging functionality. For example, to set a breakpoint, simply click on the left side of the line number in the editor. A red dot appears, indicating that a breakpoint is active for that line:

To start a new debug session, select Run → Start Debugging from the program menu or press F5 on the keyboard:
Wrap up
In this article we setup a fully functional integrated development environment for C# on Linux. In a nutshell, we completed these steps:
- Installed the Visual Studio Code editor, including the C# extension.
- Installed the .NET 5.0 SDK for Linux.
To take the development environment for a test ride, we created a Hello World type C# console application. Afterwards, we learned how to build, run and debug the C# console application, all from within Visual Studio Code on our Linux system. Now it’s up to you to unleash your creativity and start coding in C#.
If you enjoyed this article and developing with Visual Studio Code, you might also be interested in the article about how to import a CMake project into Visual Studio Code.