
 by
by USB drives typically come preformatted as FAT32 or NTFS file systems. Although Linux can handle this, the EXT4 file system offers advantage: EXT4 gives you far better control over file permissions and ownership. As whip-cream on top, you can stop worrying about data fragmentation as well. In this article you learn how to format your USB drive with the help of GParted. GParted is a graphical user interface program, available on pretty much all popular Linux distributions.
Background
USB drives are wonderfully versatile and low-cost devices that probably every PC user makes use of. I personally use them for quickly copying files from one PC to the other and for backup purposes. Newly purchased USB drives typically come formatted as FAT32 or NTFS file systems. From a manufacturer’s perspective this makes sense: Linux, Windows and macOS can work with these file systems, making the USB drive plug-and-play.
In case you solely run Linux on your PCs, the EXT4 file system serves you far better. With the EXT4 file system, you preserve file permissions when storing data on it. Besides that you have more control over file ownership. Additionally, you do not have to worry about data fragmentation. Okay great, but how do you change the file system on your USB drive to EXT4?
This article shows you how to format your USB drive to EXT4, with the help of GParted. GParted stands for Gnome Partition editor. GParted is a graphical user interface program for creating and formatting partitions on drives. Note that it works on all sorts of drives, including: HDD, SSD, USB and SD-card. In case you prefer to work from the terminal instead, refer to the article about how to format and mount a USB drive in the Linux terminal.
What do you need
To complete the steps in this tutorial, you just need:
- Any type of Linux PC with whichever desktop environment you prefer.
- A USB drive.
Important note if your USB drive contains data that you do not want to lose: Make sure to backup the data on your USB drive first, before continuing. Your data will get lost when you format your USB drive to EXT4 with GParted.
Personally, I’ll use my Debian based laptop with Gnome desktop environment for this article.
Install the GParted program
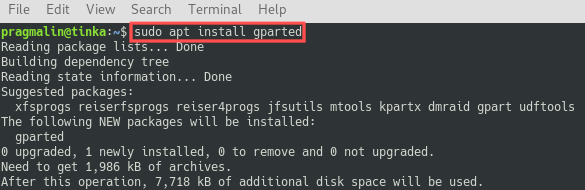
Although all Linux distributions offer the GParted program in their online package repositories, it is not installed by default. Therefore we’ll kick off this article by installing the GParted program. The following list shows the command to run in the terminal for installing GParted, filtered by Linux distribution:
- Ubuntu and Debian:
sudo apt install gparted - Fedora:
sudo dnf install gparted - openSUSE:
sudo zypper install gparted
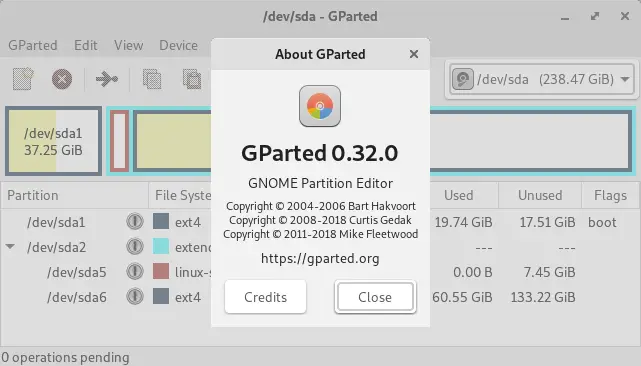
After installation completion, you can start GParted through your desktop environment’s application menu.
Identify your USB drive
Before formatting the USB drive, we first determine its device name. I personally find this procedure easiest:
- Start the GParted program, without the USB drive plugged into your PC.
- The drop-down list in the top-right corner lists all devices. Click it and make a mental note of the currently available devices.
- Plug the USB drive into your PC.
- Select GParted → Refresh Devices from the program menu.
- Now click on the drop-down lists again to see which new device showed up.
Refer to the following screen animation as an example on my PC:
As you can see, on my PC the USB drive is known as /dev/sdb. I’ll use this device name in the remainder of this article.
Unmount the partitions on your USB drive
Most Linux systems with a desktop environment automatically mount the USB drive, when plugged in. Before we can format the USB drive with GParted, we need to unmount the USB drive. Luckily, you can perform this operation directly from within the GParted user interface.
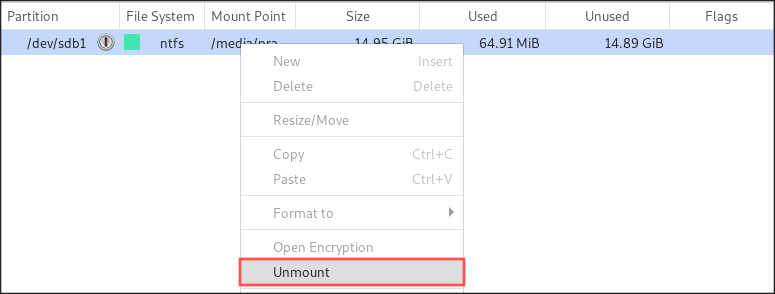
Right-click the partition on the USB drive. A context menu pops up. The context menu shows an entry called Unmount, if the partition in question is currently mounted. If the context menu doesn’t show the Unmount entry, then your partition is already unmounted. Click on entry Unmount to proceed with the unmount operation:
In case your USB drive consists of multiple partitions, repeat this step for all partitions.
Use GParted to format your USB drive to EXT4
Before formatting the USB drive with GParted, we should first remove the existing partitions. Creating a new partition table on the USB drive, automatically removes whatever partitions the USB drive currently holds.
Just one more reminder that the operation you are about to perform will result in the loss of all data on the device. Double-check that you selected the correct device in GParted and that you backed up any important data currently stored on it.
Create a new partition table
Follow these steps to create a new partition table:
- Select the correct device in the drop-down list in the top-right corner. My PC knows the USB drive as
/dev/sdb. Make sure to change this to whatever device name your PC assigned to your USB drive. - From the program menu, select Device → Create Partition Table…
- On the dialog that appeared, select msdos as the partition table type and click the Apply button.
Create a new partition
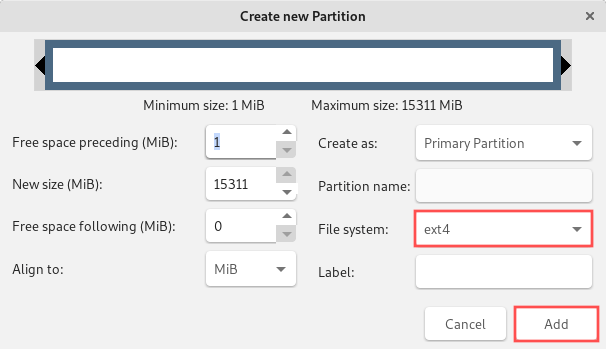
With the partition table created, we continue with the next step. In this step we create a new EXT4 partition on the USB drive and format it. From the program menu, select Partition → New. The Create new Partition dialog shows up. You can accept all the default proposed values. Just make sure that ext4 is specified for the File system and click the Add button.
Look at the status bar at the bottom. It says 1 operation pending. GParted planned the partition creation, but hasn’t actually performed this operation yet. To proceed, select Edit → Apply All Operations from the program menu. This creates the partition and automatically formats it to the EXT4 file system:
At this point you successfully formatted your USB drive to EXT4 with GParted. Go head and close the GParted program. Next, remove the USB drive from your PC and right away plug it in again. This automatically mounts the newly created EXT4 partition on your Linux system.
Obtain write permissions to your USB drive
As mentioned in the introduction, the EXT4 file system gives you better control over file ownership and permissions on your USB drive. Consequently, it can happen that your user currently does not have write access to the USB drive. Let’s investigate and solve this.
First we need to find out where Linux mounted your USB drive to. Run the following command from the terminal
lsblk -p
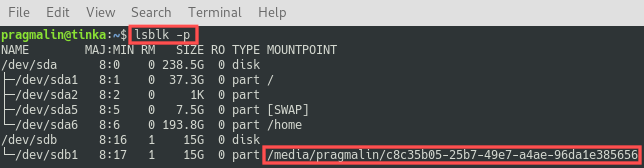
As you can see, Linux mounted the partition we created on the USB drive to: /media/pragmalin/c8c35b05-25b7-49e7-a4ae-96da1e385656.
Let’s inspect its current permissions by running the ls -l command on its parent directory:
ls -l /media/pragmalin/

As you can see in the screenshot above, only the root user has permission to write to the USB drive. That explains why our own user cannot write to the USB drive. To fix this we simply need to change the owner of the directory, where the partition of the USB drive was mounted to. In my case:
sudo chown $USER: /media/pragmalin/c8c35b05-25b7-49e7-a4ae-96da1e385656
Note that $USER automatically gets replaced with your current user name.

As you can see your user can now both read and write to the partition on the USB drive.
Wrap up
In this article you learned how to format your USB drive to the EXT4 file system, with the help of the GParted program. This file system offers advantages under Linux over FAT32 and NTFS. EXT4 gives you far better control over file permissions and ownership. Furthermore, you do not have to worry about data fragmentation.
To summarize, we completed these steps:
- Installed the GParted program.
- Identified the device name of the USB drive.
- Unmounted all partitions on the USB drive, if applicable.
- Removed all existing partitions from the USB drive, by creating a new partition table.
- Created a new partition on the USB drive, formatted as an EXT4 file system.
- Gave your user full ownership, including write permissions to the partition on the USB drive.
With the help of GParted, creating file systems and partitions becomes relatively easy. Just keep in mind that changing partitions tends to result in data loss. Therefore make sure to backup whatever important data the USB drive currently holds, before making any chances. Also always double-check that you selected the correct device in GParted. Otherwise it can happen that you accidentally erase the data on another disk.
As a follow-up article, you might be interested to learn about how to manually mount a USB drive in the Linux terminal.
2 thoughts on “Format your USB drive with GParted”
Comments are closed.