 by
by Does the Lazarus IDE look a bit too old fashioned for your liking? Multiple windows all over your desktop. Don’t let this put you off. With just a few clicks you can reconfigure the Lazarus IDE for single window mode. Resulting in a sleek and modern looking developing environment for cross-platform rapid application development.
Background
When selecting a development environment, to develop a graphical user interface application under Linux, you should definitely check out the Lazarus IDE. You write your code in the Object Pascal language. A versatile object oriented language, which is easier to learn than C++. Yet being a compiled language you’ll get similar run-time performance. Definitely a bit faster than Python and Java. As an added benefit, you can develop cross-platform with the Lazarus IDE. One code-base to build your application on Linux, Windows and macOS. To this day, it’s still the quickest and easiest tool to build a GUI. But that’s just my biased opinion. Just give it a try yourself.
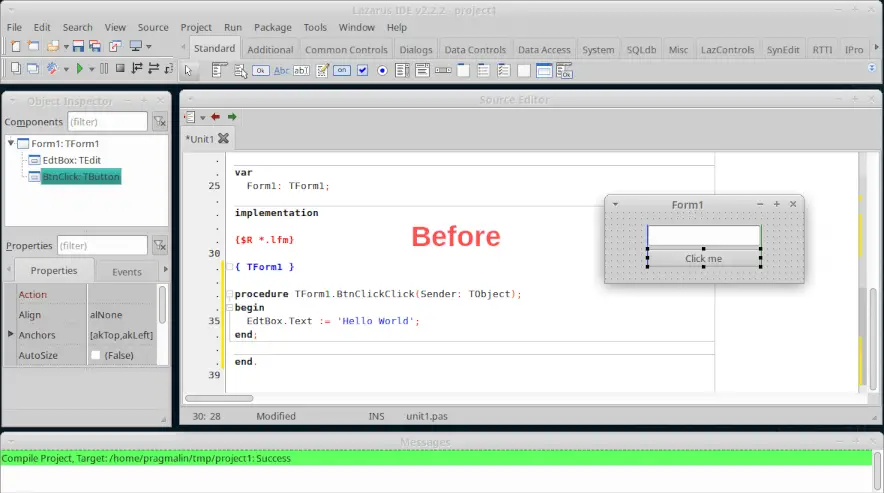
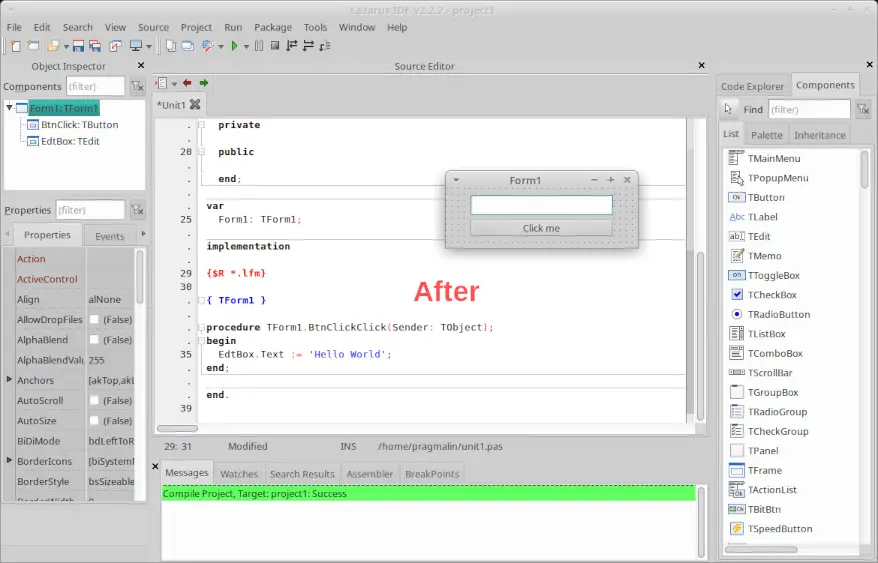
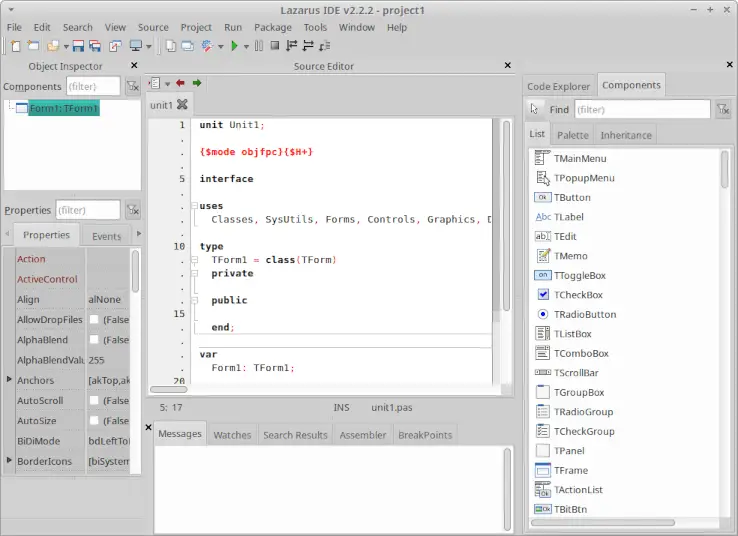
After first running the Lazarus IDE, you might think it looks a bit outdated. Windows all over the place. That has an historical reason. The initial version of Lazarus was modeled after Delphi, which used the same multiple window user interface back in the day. But don’t let this first impression taint your opinion. The Lazarus IDE also supports a modern single window mode. You just need to enable it. And that’s exactly the topic of this article. I’ll show you how to reconfigure the Lazarus IDE for single window mode. Below you can see the before and after screenshots to give you an idea:
What do you need
To complete the steps in this article to configure single window mode, you just need the Lazarus IDE installed on your PC. Since this blog focuses on Linux, I’ll use openSUSE Tumbleweed throughout this article. However, configuring the single widow mode on the Lazarus IDE works exactly the same on Windows and macOS.
In case you did not yet install the Lazarus IDE on your Linux system, you can follow the instructions from the previously published article:
Install the anchor docking manager in the Lazarus IDE
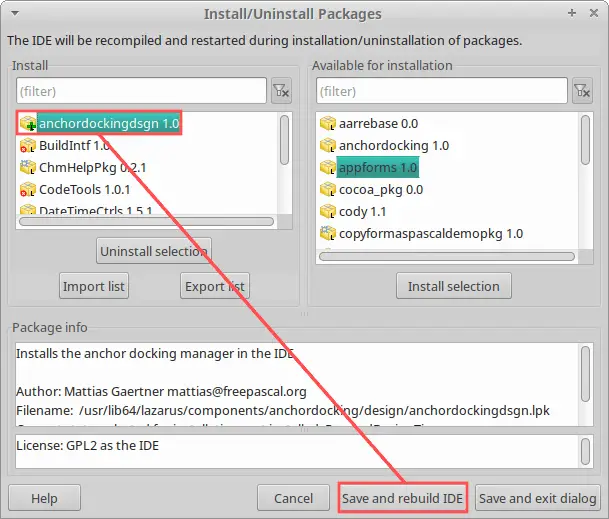
Let’s dive right in. The enable the single window mode in the Lazarus IDE, you just need to install the anchordockingdsgn package. From the Lazarus IDE, select Package → Install/Uninstall Packages from the program menu. On the dialog that appeared, double-click the anchordockingsdsgn package in the list on the right side. This will move it to the list on the left side, with to-be installed packages.
Before continuing, double-check that you selected package anchordockingdsgn for installation and not the anchordocking package. The latter one you could install, if you wanted to add docking window support to an application that you develop yourself. To complete the package installation, click the Save and rebuild IDE button at the bottom of the dialog:
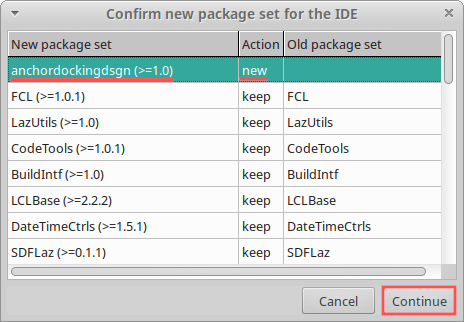
This brings up a confirmation dialog with an overview of the package set for the IDE. Simply click Continue at the bottom to start the rebuild of the Lazarus IDE:
The rebuild can take a few minutes, depending on the performance of your PC. Once done, the Lazarus IDE automatically restarts. Note that if you had a Lazarus project open, it will ask you if you want to save the changes to your project, before restarting. Once restarted, you get presented with the Lazarus IDE, running in single window mode. It still looks a bit old fashioned. In the next sections, we’ll take care of that.
Configure the general docking options
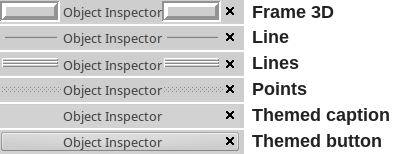
By default, the header of the docked windows use the Frame3D header-style. Not the most modern look in my opinion. As such, I usually change the header style to something that more appeals to the eye. A brief overview of the available header styles:
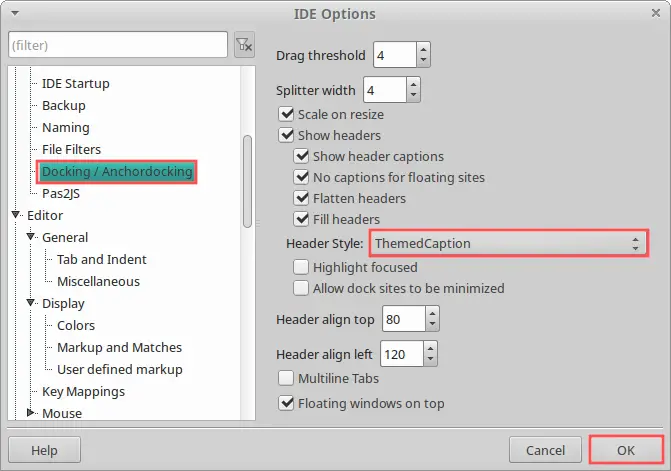
To change the header style of docked windows, select Tools → Options from the program menu. On the IDE Options dialog that appeared, select category Docking / Anchordocking and change the header style to your personal preference. I quite like the Themed caption one. Click the OK button to apply the changed header style.
Tip: To quickly access these docking options, you can alternatively right-click the header of a docked window and select Docking options from the context menu that popped up. Feel free to play around with different docking options to find your preferred settings.
The benefit of docked windows is of course that you can reorganize the location of the windows on the user interface. To move, un-dock and re-dock a window, grab it by its header and just move it to where you want it. To grab it, place your mouse pointer on the header and keep the left mouse button down. Note that this also applies if you un-docked a window. So to re-dock it, grab it by the header and not the window’s title bar. I made this mistake myself a few times..
Remove redundant component palette
After enabling the single window mode for the Lazarus IDE, you’ll notice that the component palette is shown twice on the user interface. One time on top, as usual. Then also on the right side:
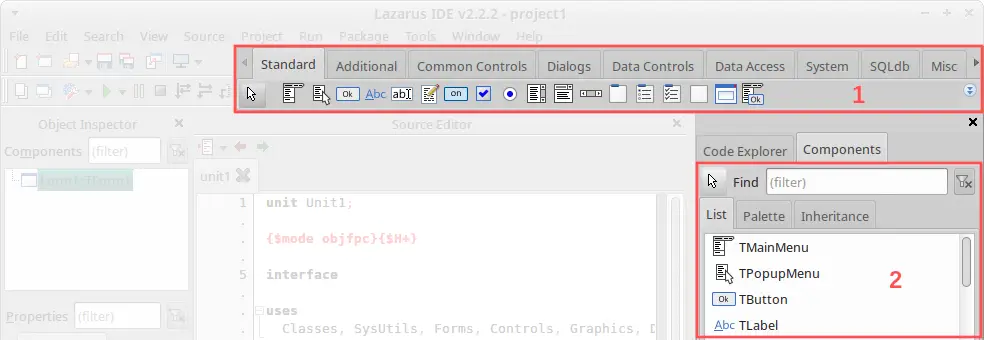
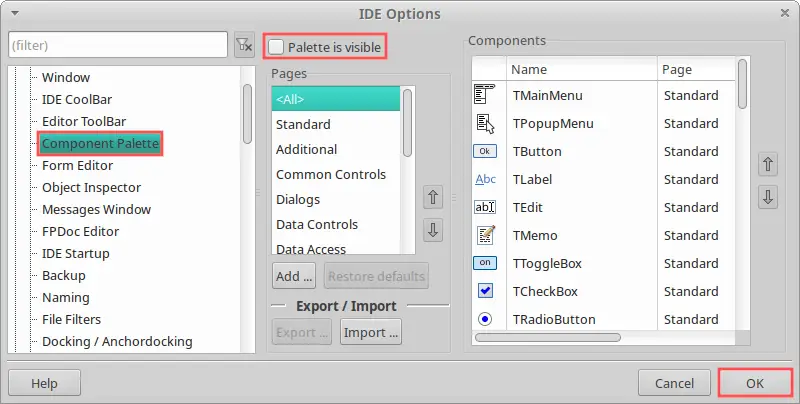
If this doesn’t bother you, then no need to change anything of course. I personally prefer to remove the one on top (1).To disable the component palette on the top, select Tools → Options from the program menu. On the IDE Options dialog that appeared, select category Component Palette and uncheck the Palette is visible box. You can always enable it again, by checking the box.
After also moving the toolbar button-groups around, to reclaim some screen real-estate for the remaining windows, the resulting user interface now looks like:
Add the project inspector
Besides moving around existing windows on the user interface, you can also add and dock new windows. This section demonstrates how to add the project inspector window. Not absolutely necessary, but nice to have if you prefer quick access to all project files. From the program menu select Project → Project Inspector. This displays the project inspector as a separate and un-docked window.
To dock the project inspector window, grab it by its header (not the title bar), drag it to the dock location where you want it and dock it by releasing the left mouse button. I prefer the project inspector as an additional tab on the right side, right next to the component palette:

Revert back to the default settings
The .lazarus directory contains all your Lazarus IDE settings, including the recently rebuilt Lazarus IDE. By deleting this directory, you essentially revert back to the default settings. So all the way before we installed the anchordockingdsgn package to enable single window mode for the Lazarus IDE. Note that you can also just rename the directory to keep a backup of the settings, in case you might want to restore them later on.
The steps to revert back to the default settings:
- Open your file manager.
- Go to your user’s home directory.
- Make sure hidden files are shown.
- Delete directory
.lazarus
Wrap up
This article explained in full detail how to enable the single window mode for the Lazarus IDE. Basically a modernized version of the Lazarus IDE that supports window docking. Afterwards we reconfigured the resulting user interface to make it look more aesthetically pleasing with an optimized screen real estate usage.
Follow this link for more Lazarus related tutorials: