 by
by The Python package ecosystem offers and abundance of readily available building blocks for your Python applications. Great for your productivity as a Python developer. However, it can quickly become a dependency nightmare. Especially when Python applications depend on different versions of the same Python package. You can sidestep this problem with the help of a Python virtual environment. This article explains how you create and manage a Python virtual environment in the Linux terminal.
Background
A great strength of the Python programming language is the huge number of available third party packages. As a Python developer, you can leverage these functionality building blocks and get to your prospected end-result quicker. Package developers publish their Python package(s) on the Python Package Index (PyPI) website. The PyPI currently hosts over three-hundred-thousand packages.
Before your project can use such a third party Python package, you need to install the package into your Python environment. At this point it gets tricky. By default, you install the Python package system wide. Convenient on the one hand, because all your other Python applications can access it. A problem waiting to happen, on the other hand. Here’s why: You can only install one version of a specific Python package. What if two Python applications require the same Python package, but a different version?
The creation of a Python virtual environment allows you to bypass this problem. The recommended approach is to create a Python virtual environment for each of your Python development projects. You then install the required packages into the virtual environment of your Python development project, instead of system wide. When distributing your Python application, you can use Shiv or PyInstaller to bundle all required packages together with your Python application.
Some Python development environments offer functionality to handle the virtual environment creation and management automatically for you. I covered how to do this with PyCharm in a previous article. You can also manually create and manage your Python virtual environment directly in the Linux terminal. This article shows you how. I often use this method myself when I want to briefly install and test out a Python application, without it clogging up my system’s Python environment.
What do you need
To create and manage a Python virtual environment in the Linux terminal, you just need to have Python related development packages installed on your Linux system. Here follow the installation instructions for popular Linux distributions:
- Debian / Ubuntu:
sudo apt install python3 python3-dev virtualenv - Fedora:
sudo dnf install python3 python3-devel python3-virtualenv - openSUSE:
sudo zypper install python3 python3-devel python3-virtualenv
For this article, I’ll be using my openSUSE Tumbleweed system.
Create a new Python virtual environment in the Linux terminal
Before jumping into the actual creation of the Python virtual environment in the Linux terminal, let’s first decide on where to store it. I recommend to store all your Python project’s virtual environments in one central place. For example in the venv directory inside your home directory. Assuming a Python project named testproj, its virtual environment would then be located in directory:
~/venv/testproj/
Now that we know where we want to store our Python virtual environments, let’s move on to the actual creation of one. Later on in this article we’ll create a quick example Python application, called testproj. We create the Python virtual environment for testproj with the help of the virtualenv tool. Run the following command in the terminal to create the Python virtual environment for project testproj:
virtualenv --python=python3 ~/venv/testproj
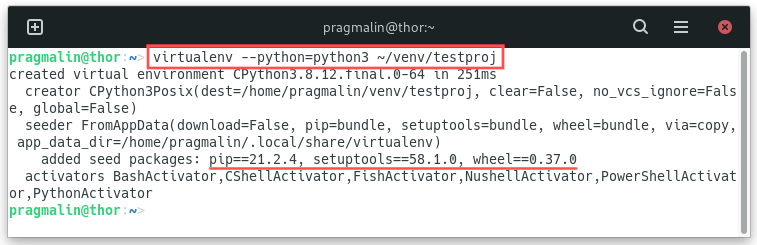
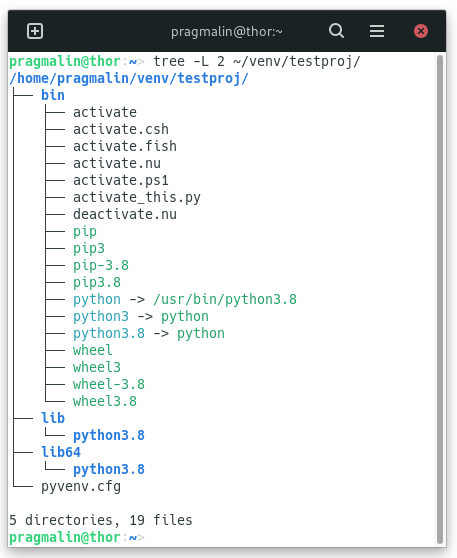
If you look closely at the output of this command, you’ll notice that virtualenv automatically installed the packages pip, setuptools and wheelfor us. Convenient, because you need these packages to install other packages into the virtual environment. Either from PyPI or manually. Feel free to look around inside the directory of the newly created virtual environment. A quick peek:
Activate a Python virtual environment in the Linux terminal
At this point your Linux system holds multiple Python environments. First the global system wide one. And now an additional virtual environment testproj. Consequently, you need to explicitly inform your Linux system about which one you want to use. When working in the terminal, the default active Python environment is always the global system wide environment. To switch to the testproj virtual environment, we execute the content of the bin/activate file with the source command.
What is the source command? It’s build-in shell command to read and execute contents of file. In our case the bin/activate file inside our Python virtual environment. Why use the source command? Well, the bin/activate file instructs us to do so:
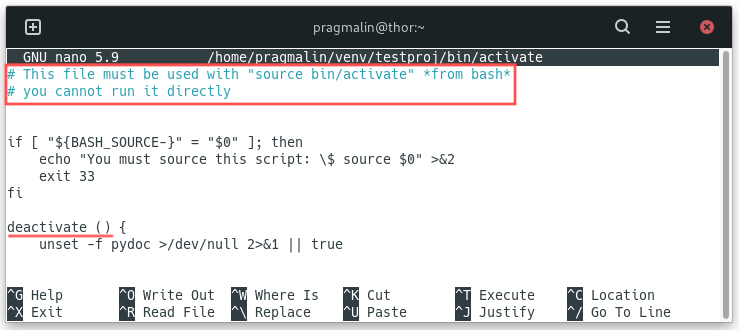
Not important at this point, just notice that the bin/activate file also contains a function deactivate. We’ll get to that later on.
Alright, enough background information. Let’s go ahead and actually activate the testproj virtual environment with this terminal command:
source ~/venv/testproj/bin/activate
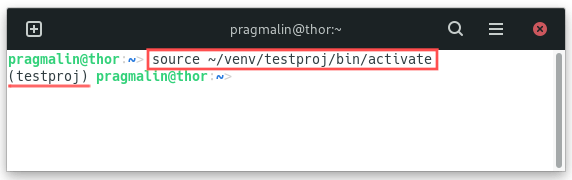
As you can see in the screenshot, the name of the currently active Python virtual environment is added in front of the command prompt.
Deactivate a Python virtual environment in the Linux terminal
In the previous sections you learned how to create and activate a Python virtual environment in the terminal. For completion purposes, I’ll show you right away how to deactivate the Python virtual environment. As mentioned earlier on, the bin/activate script also loads the deactivate command into your shell environment. That means that whenever you want to deactivate the Python virtual environment, you simply type deactivate in the terminal.
There is no need to actually do this right now, because we still plan on working a bit in our shiny new testproj virtual environment. Nonetheless, I’ll already show you how to do this:
deactivate
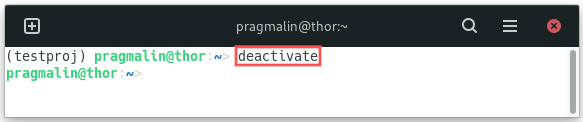
You’ll notice that the name of the virtual environment, in front of the command prompt, disappeared again. Proof that we successfully switched back to using the global system wide Python environment.
Install a PyPI package into the Python virtual environment
With our newly created and activated Python virtual environment, let’s take it for a spin. The whole idea of a Python virtual environment is to have a project specific isolated location for installing Python packages. That’s exactly what we’ll do right now. For example purposes, I decided on installing the passwordgenerator package from PyPI.
The passwordgenerator package contains functionality to easily generate passwords that are difficult for a computer to brute force, yet easy to remember for a user. It’s the perfect example for demonstrating a Python virtual environment, because it not only contains a library for you to use in your own Python application. It also contains a ready-made Python application that you can run for generating passwords.
You install a Python package with the help of the pip tool. A convenient feature of pip is that it automatically searches and installs a package from the PyPI online Python package index. The command to install the passwordgenerator package from PyPI into the testproj Python virtual environment:
pip install "passwordgenerator"
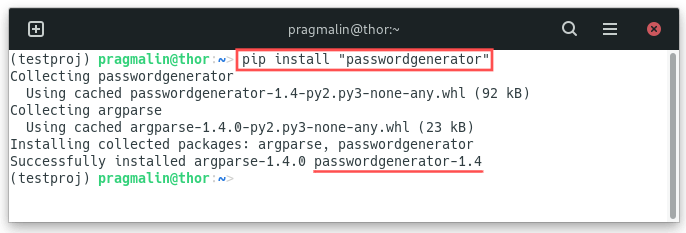
In the output of the package installation command, you see that pip installed version 1.4 of the passwordgenerator package. Simply because that was the latest available version of the package, when I ran the command. With pip you can also explicitly install a specific package version. For example, if I wanted version 1.3, I could run:
pip install "passwordgenerator==1.3"
Run an installed application from the Python virtual environment
In the case of the passwordgenerator package, it not only includes a library for generating passwords from your own Python application. It also includes a ready-to-run Python application to do the same thing. Perfect for demonstrating the Python virtual environment even further.
When you activate a Python virtual environment, its bin subdirectory is added to the search path. The following screenshot proves this, by inspecting the PATH variable without and with the virtual environment active:
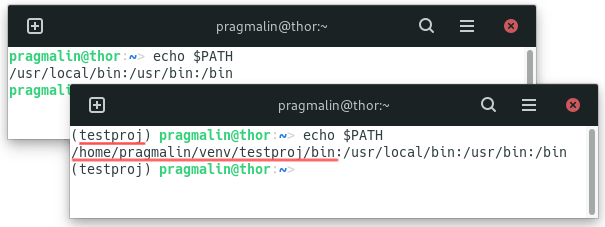
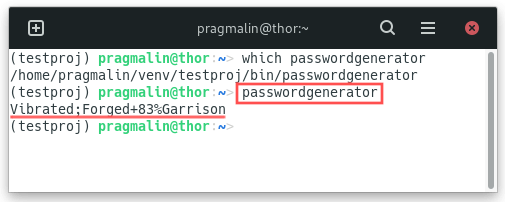
With other words, you can directly run all executables added to the virtual environment’s bin subdirectory. So without having to specify the entire directory of the executable. When installing the passwordgenerator package, pip installed an executable with the same name in the bin directory. To run it, simply type the name of this executable and it will output a strong password:
passwordgenerator
Use a Python package from your virtual environment in your own application
In most scenarios you install a Python package in a virtual environment, for the purpose of accessing its functionality in your own Python application. This section demonstrates this use case.
Create the following Python application for generating a strong password and save it as testproj, for example somewhere inside your home directory. I saved it directly in my home directory, so:
/home/pragalin/testproj
#!/usr/bin/env python3
"""
A program for generating passwords that are easy to remember for humans, yet hard to
crack for computers.
"""
# ***************************************************************************************
#  Imports
# ***************************************************************************************
from passwordgenerator import pwgenerator


# ***************************************************************************************
#  Global constant declarations
# ***************************************************************************************
# Program return codes.
RESULT_OK = 0


# ***************************************************************************************
#  Implementation
# ***************************************************************************************
def main():
    """
    Entry point into the program.
    """
    # Initialize the program exit code.
    result = RESULT_OK

    # Generate and display the password.
    new_password = pwgenerator.generate()
    print(new_password)

    # Give the exit code back to the caller
    return result


if __name__ == '__main__':
    exit(main())
Note that you can of course use a different file name for the example Python application. I merely chose testproj, because that’s the name I gave to the Python virtual environment. That way I can quickly find out which virtual environment the Python application uses, in case you created multiple virtual environments for different projects.
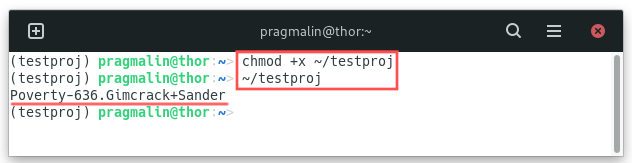
To directly run the testproj Python application, we just need to flag the file as being an executable:
chmod +x ~/testproj
Afterwards you can run it with command:
~/testproj
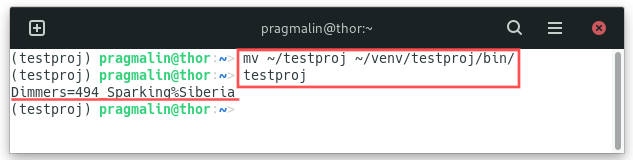
If you don’t want to specify the entire path to the executable, you can opt to move it to the bin directory, inside your virtual environment. As we saw in the previous section, the bin directory is added to the PATH after activating the virtual environment. Example:
Delete a Python virtual environment
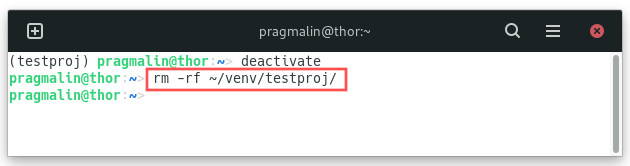
Once you completed the development of your Python application and no longer need the virtual environment, you can delete it. Simply by removing the directory. Just make sure you deactivate the virtual environment first. You can delete the testproj virtual environment with the help of your preferred file manager, or do it all directly in the terminal:
rm -rf ~/venv/testproj/
Wrap up
In this tutorial you learned everything you need to know about how to create and manage a Python virtual environment from the terminal. I highly recommend creating a Python virtual environment for each individual Python application that you develop. That way you keep you system’s global Python environment clean and you never run into a dependency problem, when it comes to Python package versions.
Here follows a summary of how to create and manage a Python virtual environment from the terminal. Just replace MyVirtEnv with the name you want to give it:
- Create a new Python virtual environment:
virtualenv --python=python3 ~/venv/MyVirtEnv
- Activate the Python virtual environment:
source ~/venv/MyVirtEnv/bin/activate
- Install a PyPI package into the Python virtual environment:
pip install "passwordgenerator"pip install "passwordgenerator==1.3"
- Deactivate the Python virtual environment:
deactivate
- Delete the Python virtual environment
rm -rf ~/venv/MyVirtEnv/
Note that some Python development environments can handle all these steps automatically for you. For example PyCharm. Refer to the tutorial about how to create a Python virtual environment with PyCharm for more details. Follow this link for more Python related tutorials on the PragmaticLinux blog.