 by
by Looking for something new to try out on your Raspberry PI 4? Give openSUSE Tumbleweed a try. openSUSE Tumbleweed is a high quality, rolling release and RPM package based Linux distribution. Enjoy accessing bleeding edge versions of all you preferred software. Install once and update forever. This tutorial teaches you step-by-step how to install openSUSE Tumbleweed on your Raspberry PI 4.
Background
Most Raspberry PI 4 owners run the default Debian based Raspberry PI operating system on their beloved board. Nothing wrong with that. In fact, I run Debian myself on most of my Linux servers and PCs. But what if you want to try out something different? Not because you have to, but just because you can. Might I suggest taking openSUSE Tumbleweed for a spin on your Raspberry PI 4? Some information about openSUSE Tumbleweed:
- A rolling release distribution. Install once and update forever. Always the latest version of everything.
- RPM package based with zypper as the package manager.
- Powerful Yast configuration and administration tool.
- Extensive automated openQA testing before each snapshot release.
- Large software repository, especially if you include openSUSE’s Open Build Service (OBS).
- Highly polished and preconfigured desktop environments.
- Community maintained and backed by SUSE.
This article shows you in easy to follow steps, how to install openSUSE Tumbleweed on a Raspberry PI 4. We’ll go for an edition with the XFCE desktop environment. A full-featured desktop environment, which is light on system resources and feels nice and snappy. Note that you can also install XFCE on top of the default Raspberry PI operating system.
What do you need
To complete the installation of openSUSE Tumbleweed with XFCE on your Raspberry PI 4, you need the following:
- Any Raspberry PI 4 board, including the relatively new Raspberry PI 400.
- A power supply for your Raspberry PI board.
- A micro-SD card of 8 GB or more in size.
- A USB mouse and keyboard.
- A computer monitor or TV.
- A cable for connecting the HDMI output to your monitor or TV.
Additionally, you’ll need a PC for downloading the openSUSE Tumbleweed image and writing this image to the micro-SD card. In this article I’ll show you how to do this with the help of Balena Etcher. An intuitive and cross-platform graphical user interface tool for writing images to an SD-card. Refer to this article for installation instructions of Balena Etcher on Debian and Ubuntu. Using a different Linux distribution? No problem. Head over to the developer’s GitHub project for detailed installation instructions.
For this article, I’ll use my Raspberry PI 4 with 4 GB RAM and my Debian 10 based laptop, with Gnome desktop environment.
Running openSUSE Tumbleweed on your Raspberry PI 4
Getting openSUSE Tumbleweed running on your Raspberry PI 4, requires just two steps:
- Writing the openSUSE Tumbleweed image to your micro-SD card.
- Booting from the micro-SD card.
Preparing the micro-SD card
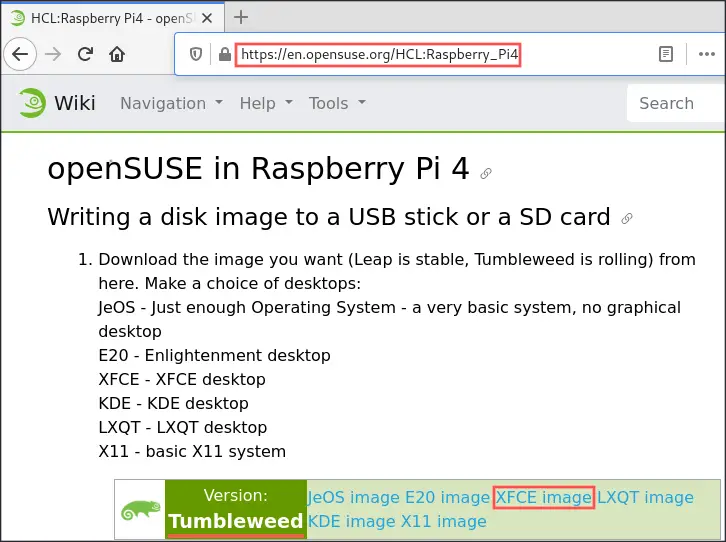
Before we can write the openSUSE Tumbleweed image to the micro-SD card, we need to download it first. Point your web browser to the Raspberry PI 4 page on the openSUSE Wiki. Start the download by clicking the XFCE image link:
Once the download completes, the openSUSE Tumbleweed image for the Raspberry PI 4 appears in your Downloads directory. In my case the filename is:
openSUSE-Tumbleweed-ARM-XFCE-raspberrypi4.aarch64-2021.01.26-Snapshot20210128.raw.xz
Now it’s time to write this image file to the micro-SD card with Balena Etcher. Insert the micro-SD card into your PC and start the Balena Etcher program. You can find it in your desktop environment’s application menu. Once Balena Etcher opens:
- Click on Flash from file on the user interface and select the downloaded openSUSE Tumbleweed image.
- Locate the Select target button on the user interface, click it and select your micro-SD card from the list.
- Start the write operation by clicking the Flash! button on the user interface.
Note that the write operation can take a few minutes to complete.
Booting openSUSE Tumbleweed for the first time
Now that we stored the openSUSE Tumbleweed image on our micro-SD card, it’s time to boot from it. Complete these steps to boot openSUSE Tumbleweed for the first time on your Raspberry PI 4:
- Insert the micro-SD card into the card slot on your Raspberry PI 4.
- Connect the Raspberry PI 4 to your monitor or TV with an HDMI cable.
- Attach a USB keyboard and mouse to your Raspberry PI 4.
- Hook-up the power supply to your Raspberry PI 4.
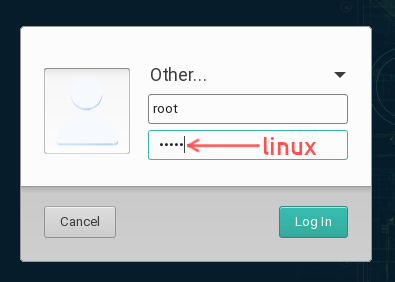
Once you hooked-up the power supply, your Raspberry PI 4 starts booting the operating system. When the operating system completed booting, it present you with a login prompt. Only the root account is available. Go ahead and login as root with these default credentials:
- Username:
root - Password:
linux
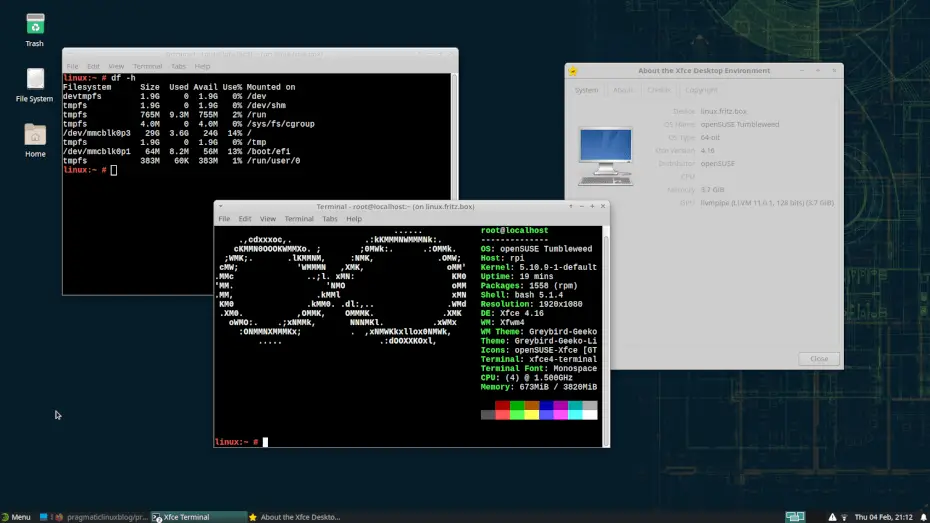
After you logged in, openSUSE Tumbleweed presents you with a fully preconfigured XFCE desktop environment:
Configuring openSUSE Tumbleweed on the Raspberry PI 4
The default configuration of openSUSE Tumbleweed on the Raspberry PI 4 does not create a user account. Having just a root account poses a security thread. You should really create a separate user account. Ideally one where you can run commands with sudo to obtain super user privileges, when really needed. This section therefore covers how to create a new user account.
Connect to your WiFi network
For the creation of a new user account, as described in this section, we need to install a software package. This package resides in the openSUSE Tumbleweed online software repository. Before we can install software packages from there, we need to first configure Internet access for our Raspberry PI. In case you already hooked up your Raspberry PI to the Internet with an Ethernet cable, you can skip this section.
Click the little network icon in the task bar. The pop-up menu lists all the WiFi networks within reach. Select your WiFi network from the pop-up menu.

If your WiFi network requires you to enter a security passphrase, a dialog appears allowing you to do so.
Create a new user account with sudo access
Only users added to the wheel group can obtain super user privileges with the help of sudo. Before we can add a user to the wheel group, we need to assure that this group exists.
Install dependencies
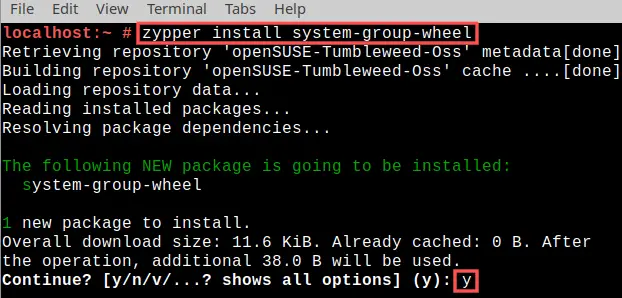
On openSUSE Tumbleweed, we create the wheel group by simply installing software package system-group-wheel. Open the terminal program and run the following command:
zypper install system-group-wheel
New user account creation
At this point we can continue with creating our new user account. openSUSE comes with the powerful Yast system administration tool. Creating a new user with Yast is a piece of cake. Locate Yast in the application menu and start it. Once opened, click on User and Group Management. Now follow along with the steps shown in the animation below, to create your new user account. Make sure to add your user to the wheel group:
Edit the sudoers file
You could now log in with your new user account. However, you’ll notice that you need to enter the root password, each time you run a command as sudo. I personally do not like this. I’d rather enter my own user’s password for this. We can make a few modifications to the /etc/sudoers file to make this happen.
You should not edit the sudoers file directly. Instead, edit it by running the visudo command. This way a syntax check is performed automatically when you save the changes. This prevents incorrect entries, which could potentially leave you with a broken system. So go ahead and open the terminal and run:
visudo
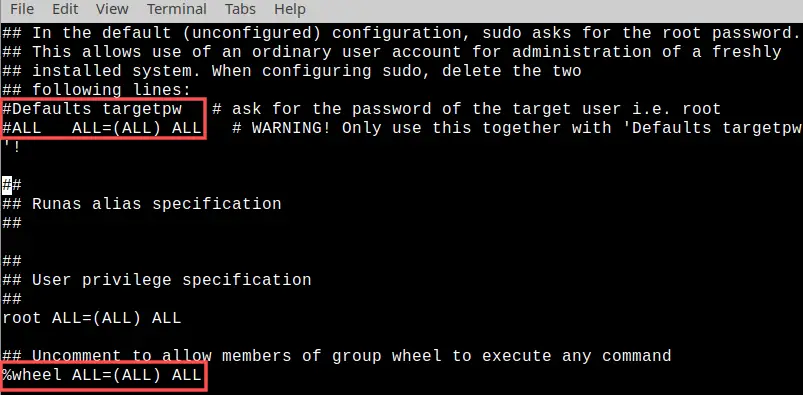
This opens the /etc/sudoers file for safe editing with the vi editor. Complete these steps:
- Press the i key to switch to insert mode.
- Locate the line “
# %wheel ALL=(ALL) ALL” and remove the # to uncomment it. - Comment out the line “
Defaults targetpw” by adding a # in front of it. - Similar for the “
ALL ALL=(ALL) ALL” line. Find it and add a # in front of it. - Switch back to command mode by pressing the ESC key.
- Save the changes and exit by typing :wq, followed by pressing ENTER.
This completes the new user creation. Go ahead and log out the root user. Next, log back in with your newly created user account credentials. To test that sudo works for your user, you could run command:
sudo zypper refresh
This just refreshes the metadata of software packages available in the openSUSE Tumbleweed online software repository.
Change the default root password
Now that you logged in with your new user account, try opening the Yast program again. A dialog pops up for entering the root user password (currently linux). Others can easily guess this password, so we should change that. You can change it to whatever you want. For convenience, I changed it to the same password as I configured for my user account. That way I can open Yast by entering my own password.
In Yast go to the User and Group Management section and change the root user password:

Perform a system upgrade
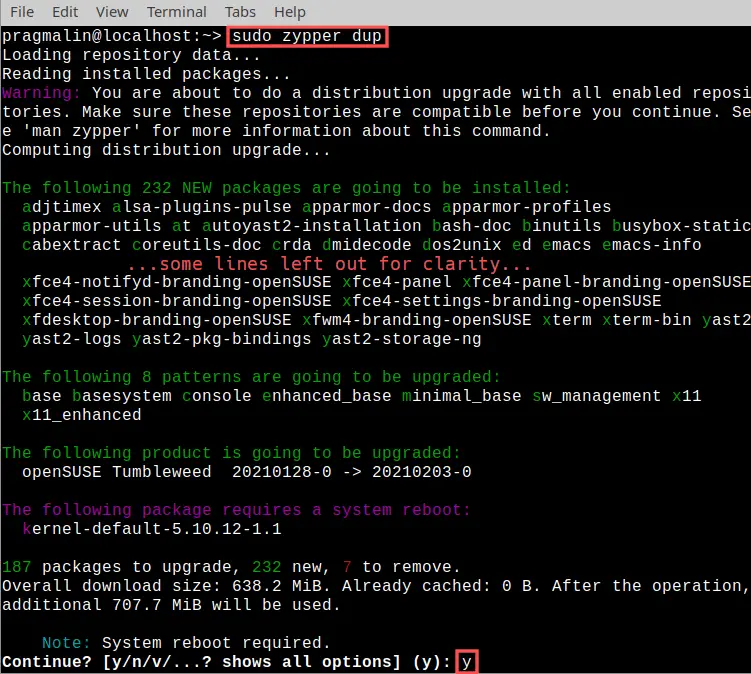
Your Raspberry PI 4 now runs a fully configured openSUSE Tumbleweed. As a rolling distribution, software package updates arrive frequently. Typically once or more per week. Sometimes with just feature updates, but often also with security improvements. Therefore you should keep your openSUSE Tumbleweed operating system up-to-date. How do you do this? Quite easily by running the following command from the terminal. Note that dup stands for distribution upgrade:
sudo zypper dup
Wrap up
After working your way through this article, your Raspberry PI 4 now runs openSUSE Tumbleweed. A high quality and community driven rolling release distribution. To summarize, we performed these steps:
- Downloaded the openSUSE Tumbleweed image for the Raspberry PI 4.
- Wrote the image to the micro-SD card, with the help of Balena Etcher.
- Booted openSUSE Tumbleweed for the first time on our Raspberry PI 4.
- Created a new user account with administrative access rights.
- Changed the password of the
rootuser.
How does it run? Quite well actually. I wrote the majority of this article directly on my Raspberry PI 4, running openSUSE Tumbleweed. Including screenshot taking and minor image editing with GIMP. I did notice that booting takes a lot longer than the default Debian based Raspberry PI operating system. Definitely a worthy alternative, in case you prefer a rolling release Linux distribution.