 by
by The VirtualBox guest additions comprise of a driver collection that improves the integration between the host and the guest. It makes it easier and more enjoyable to work with your virtual machine. For example, it allows you to resize the screen and share folders and a clipboard between the host and the guest. This article shows you how to install the VirtualBox guest additions in Debian 10.
On the 14th of August 2021, the Debian team released the successor Debian 11 “bullseye”. A newer version of this article is availabe, which covers the topic of how to install the VirtualBox Guest Additions in Debian 11 “bullseye”.
Background
After installing your shiny new Linux operating system as a virtual machine in VirtualBox, you boot it up for the first time. The login manager appears and with full anticipation you log in and wait for your desktop environment to show up. The virtual machine window looks a bit small, so you resize or maximize its window. But wait..your screen didn’t resize!
Does this scenario sound familiar? The cause of this problem is that the optimal video driver is not yet installed. The VirtualBox guest additions contains this (and other) drivers to improve the integration between the host and the guest. This article explains step-by-step how to install the VirtualBox guest additions in Debian 10. It assumes that you have a freshly installed Debian 10 virtual machine with desktop environment. I installed Gnome in my virtual machine. However, your can of course install whatever desktop environment your prefer.
Even though the instructions presented in this article target a Debian 10 virtual machine, the concept applies to other Linux distributions as well. You just need to adjust some of the commands to make it work for other Linux distributions.
VirtualBox guest additions
The VirtualBox Guest additions is a collection of drivers that can be installed in the guest virtual machine. Some example functionality included in the guest additions:
- A better video driver that enables you to resize the virtual machine window or work with it in full screen mode.
- A shared clipboard can be enabled in your virtual machine for copy-pasting text between the host and the guest.
- Any directory on your host can be configured as a shared folder, allowing you to access it from the guest.
VirtualBox ships with an ISO image containing the VirtualBox guest additions. Think of it as a CD-ROM that you can virtually insert into your virtual machine. It contains a script for building and installing the guest additions relatively easy. I can highly recommend that you install the VirtualBox guest additions in Debian right after you booted up the virtual machine for the first time.
Note that you only really need the VirtualBox guest additions if you installed Debian with a desktop environment. If you installed your Linux virtual machine as a server, you do not need them. In this case you would primarily interact with it through either SSH or probably a web-based administration interface. In this case the added functionality of the VirtualBox guest additions doesn’t really result in added benefits for you.
Operating system update
Start by booting up your Debian virtual machine and log into the desktop environment. Before we install anything, we should first update the system. In order to do this, open up the terminal and run the following two commands:
sudo apt update
sudo apt upgrade
Installing dependencies
The drivers included in the VirtualBox guest additions are basically Linux kernel modules. Kernel modules allow you to extend the Linux kernel, without the inconvenience of having the reconfigure and rebuild the kernel entirely.
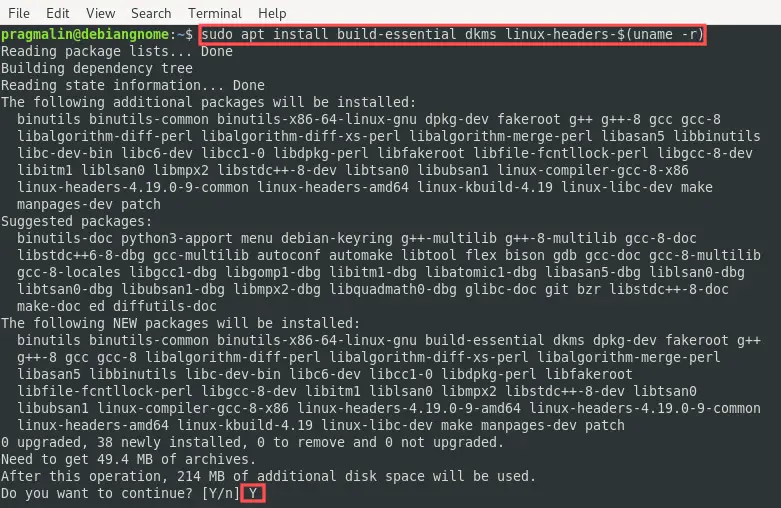
During the installation process of the VirtualBox guest additions, the included kernel modules are rebuilt, specifically for the current version of your Linux kernel. Building Linux kernel modules requires the installation of a few packages. Therefore we continue with the installation of these package dependencies, before we attempt to install the VirtualBox guest additions. Proceed by running the following command to install all needed dependencies:
sudo apt install build-essential dkms linux-headers-$(uname -r)
Insert the VirtualBox guest additions CD
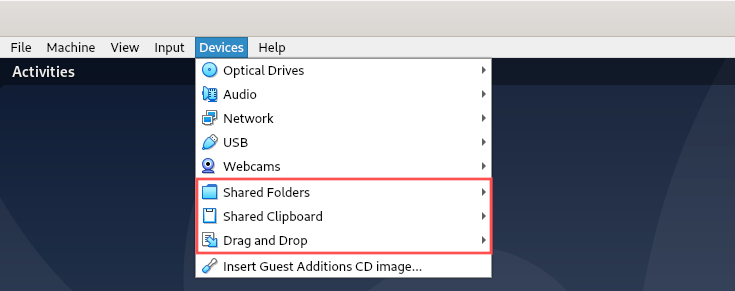
As mentioned in the beginning of this article, the VirtualBox guest additions are located on a CD image. To access the CD contents, we need to insert the CD into the virtual CD-ROM drive of your virtual machine. Simply select Devices → Insert Guest Additions CD Image… to insert this CD-ROM into the virtual CD drive:
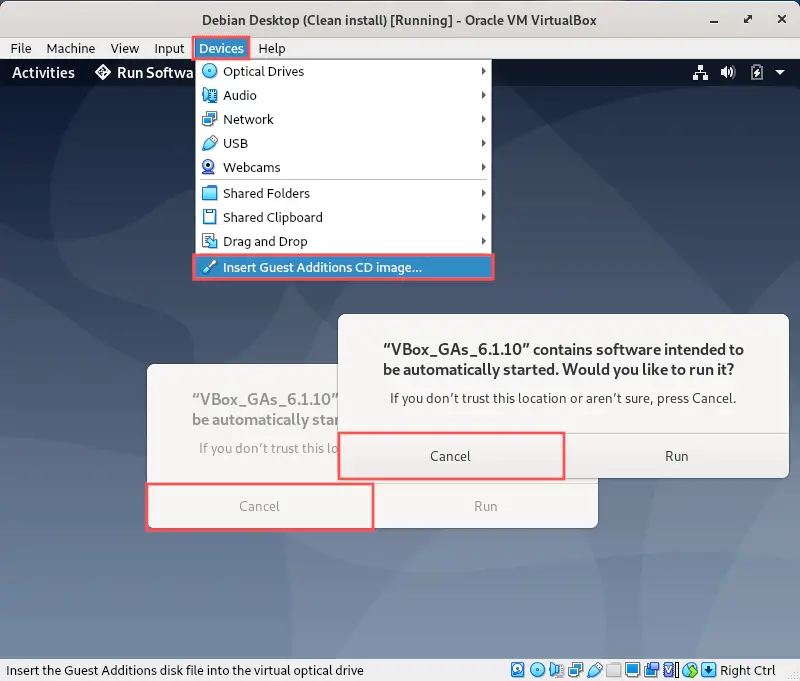
After inserting the CD-ROM, Debian automatically mounts the CD-ROM for you. While doing so, it attempts to automatically run software on the CD-ROM. Click Cancel on these dialogs.
Theoretically, we do need to run this software for installing the VirtualBox guest additions, but the installation needs to be done with super user privileges. Therefore, we cancel the installation now. Later on we will start the installation manually from the terminal, where we can use sudo to perform the installation with super user privileges.
Determine the CD-ROM mount point
Since we plan on starting the installation of the VirtualBox guest additions manually from the terminal, we need to determine the directory where the CD-ROM was automatically mounted to. The CD-drive is a read-only block device under Linux. As such we can use the lsblk command to determine the mount point. Open up the terminal and run the following command:
lsblk | grep "rom"

From the command output we can extract that Debian mounted the CD-ROM with the VirtualBox guest additions to directory /media/cdrom0.
It is possible that Debian did not automatically mount the CD-ROM. In this case refer to this article. It contains instructions on how to create a mount point and then manually mount the CD-ROM in the virtual CD-drive.
Install the VirtualBox guest additions
At this point you completed all preparations to install the VirtualBox guest additions in Debian. To start the installation, all you need to do is open the terminal and run the command:
sudo sh /media/cdrom0/VBoxLinuxAdditions.run
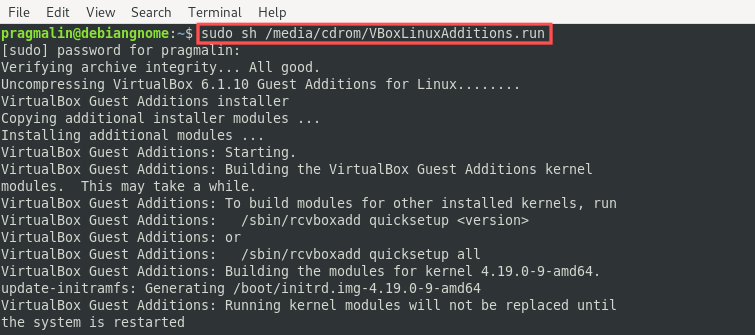
As noted on the last line in the terminal output, you should restart your Debian virtual machine. Only then will the newly installed kernel modules of the VirtualBox guest additions become functional. For a quick way to initiate a reboot from the terminal, you can run the command:
sudo reboot
After your Debian virtual machine boots up again and you logged into the desktop environment, try maximizing the screen. You’ll notice that your desktop now automatically resizes and adjusts the screen resolution.
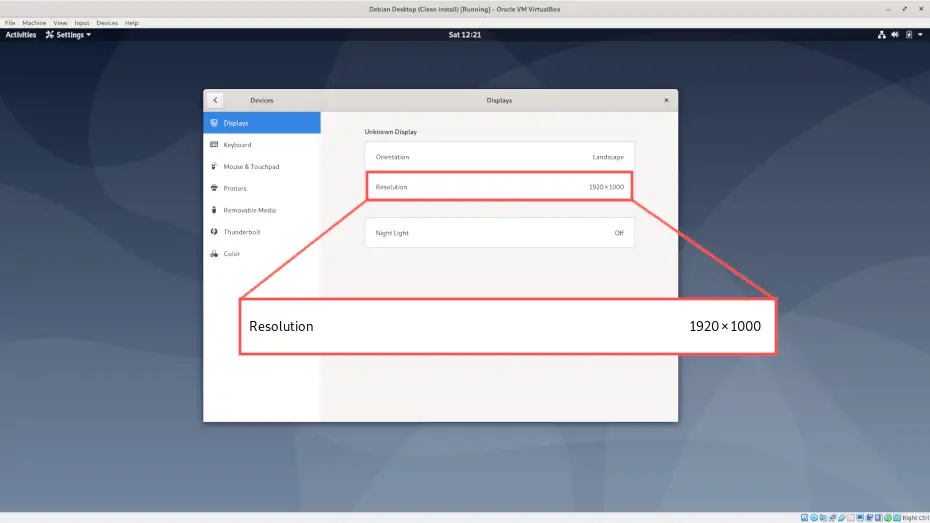
This proofs that the new video driver is active and consequently that the installation of the VirtualBox guest additions in Debian was successful.
Wrap up
After completing the instructions in this article, you managed to install the VirtualBox guest additions in your Debian virtual machine. Resizing the screen and working in full screen mode now works properly and the overall performance of your virtual machine improved. After completing the VirtualBox guest additions installation, you can also try out its other features, such as the shared folders and the shared clipboard between the host and the guest: