 by
by A version control system, combined with an issue tracking system, are must-have tools for serious software development. Each time you commit a code change, you can link it to an issue. Likewise, each time you report an issue, you can link it to a specific code revision. Perfect for backtracking what changed in the code, when, why and who made the change. With Git, this only works if you properly configured your username and email. This article explains how to setup your Git username and email.
Background
If you want to get into software development, it is crucial that you gain experience with version control systems. With a version control system you track and manage source code changes. Each time you developed a new feature, fixed a bug or made a small improvement, you can commit the changes into the version control database (also called repository). At any time, you can recover each change you ever made.
The two predominant version control systems are Git and Subversion (SVN). With Git taking the lead in popularity since the year 2014. Being a non-distributed version control system, SVN is a bit easier to get into. However, given Git’s popularity, Git should definitely be your first choice. Especially if you take into account the excellent GitHub and GitLab web applications, where you can host your Git version control repositories for free.
A version control system goes hand-in-hand with a issue tracking system. You can cross-reference issues and code commits. Let’s say someone reported a bug in the issue system. The issue description could mention the commit number. That way all developers know what code revision to grab, when trying to reproduce the bug. Likewise, when working on a fix for the bug, you can write the issue number in the log message that you enter, when committing code changes. This way you can always backtrack not only what was changed in the source code and when, but also why and by whom.
This latter part only works if you properly configured your Git username and email. Something you should do right away after installing Git on your Linux system. This article explains how to setup your Git username and email, both globally and locally.
What do you need
Since this article covers how to setup your Git username and email, it implies that you already installed Git on your Linux system. The following list shows the installation instructions to install Git on popular Linux distributions:
- Debian/Ubuntu/Raspberry PI:
sudo apt install git - Fedora:
sudo dnf install git - openSUSE:
sudo zypper install git
Furthermore, the article assumes that you already cloned a Git repository. If you don’t have one yet, you can fork one of PragmaticLinux’ Git repositories in your GitHub account. For example the cmake_c_app repository, featured in the article:
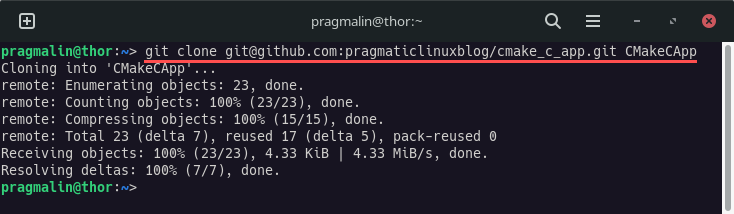
Once you forked this Git repository into your own GitHub account, you can clone it to your home directory with command:
git clone git@github.com:<your_github_account>/cmake_c_app.git ~/CMakeCApp
Setup your Git username and email globally
Before you can commit code changes to a Git repository, you need to always first setup your username and email. This gets tedious if you need to do this every time, for each cloned Git repository. Luckily, Git allows you to setup your username and email globally. Meaning that it always takes this username and email as the default.
Git stores your globally configured username and email in the following file inside your home directory:
~/.gitconfig
Theoretically, you could create and edit this file with a text editor. However, this increases the chance of making a syntax mistake. The less error-prone approach is to use Git’s a build-in command for configuring the global username and email:
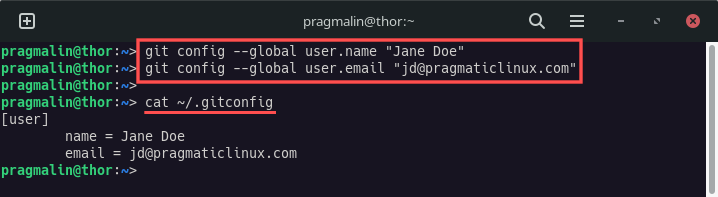
git config --global user.name "Jane Doe"
git config --global user.email "jd@pragmaticlinux.com"
To verify that the configuration succeeded, you could display the contents of the ~/.gitconfig file with the help of the cat command:
cat ~/.gitconfig
Git graphical user interface programs typically also offer a means to display the currently configured global username and email. Example with gitg:
Setup your Git username and email locally
In certain situations, you might want to use a different username and email for a specific cloned Git repository. For example if you use different GitHub or GitLab accounts. On my system I set the global username to PragmaticLinux and the email to info@pragmaticlinux.com. However, sometimes I want to work on a Git repository in my personal GitHub account. In this case I want to use a my actual first and last name for the username and my private email address.
With Git you can override the globally configured username and email for a specific cloned repository. It stores the local username and email inside the cloned Git repository:
~/CMakeCApp/.git/config
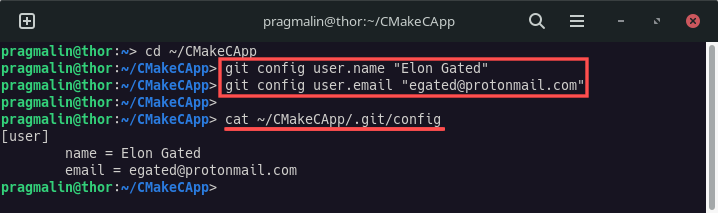
Configuring the Git username and email for one specific locally cloned repository is similar to the global configuration. You just point your terminal to the directory of the cloned repository and then omit the --global flag:
cd ~/CMakeCApp
git config user.name "Elon Gated"
git config user.email "egated@protonmail.com"
To verify that the configuration succeeded, you can use the cat command again:
cat ~/CMakeCApp/.git/config
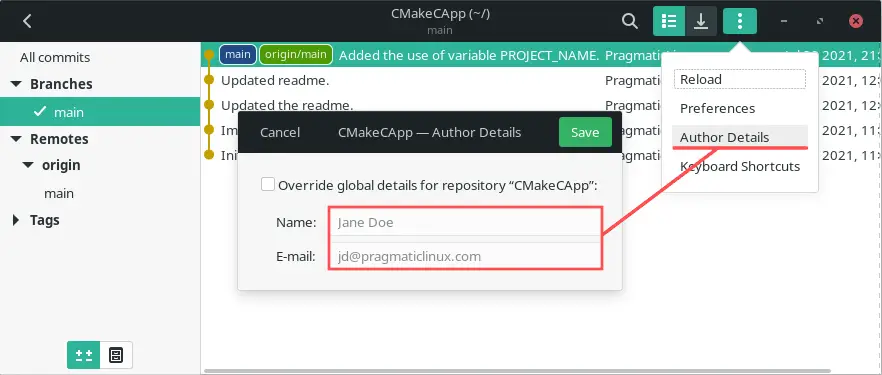
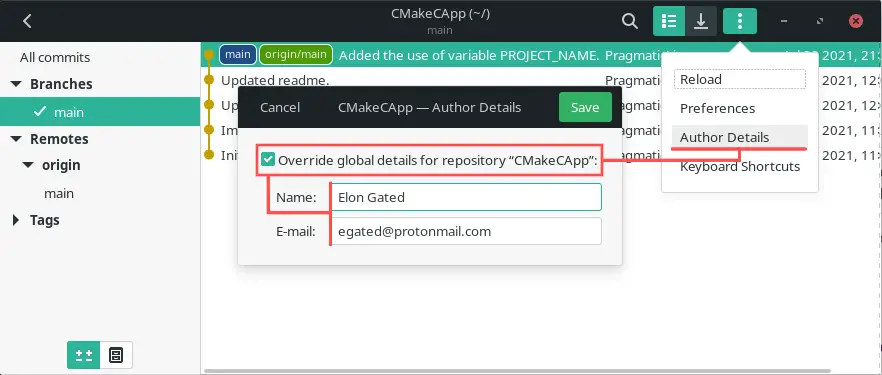
If you prefer to avoid working in the terminal, you can also use a Git graphical user interface program to override the globally configured username and email, with a repository specific one. Example with gitg:
Wrap up
This tutorial explained how to configure your Git username and email in two ways:
- Globally for your user. The default for all your cloned Git repositories.
- Locally for a specific cloned Git repository.
When you commit a code change to a Git repository, the commit gets tagged with this username and email. For this reason it is important to properly configure it. Ideally right after you installed Git on your Linux system.